A Guide to Privacy On-Chain: Aztec Network
The whole world doesn't have to see EVERYTHING you do, here is how to stay private.
Aztec Network
“Can I get a little privacy here?”
What is Aztec Network?
In short it is a smart contract protocol that shields your on-chain activity to give you a bit of privacy from peering eyes.
- You can fund a brand new wallet privately (similar to tornado cash but cheaper)
- Send funds to another wallet within Aztec network- privately
- Use defi protocols privately (currently Lido and Element fi)
Why would I need this?
Privacy is our right and while operating on a public ledger such as Ethereum it can put individuals at risk if one were to match your identity to your wallet. Do you publicly show your bank savings account for the world to see? If bad actors knew how much you had available to you, would you feel safe?
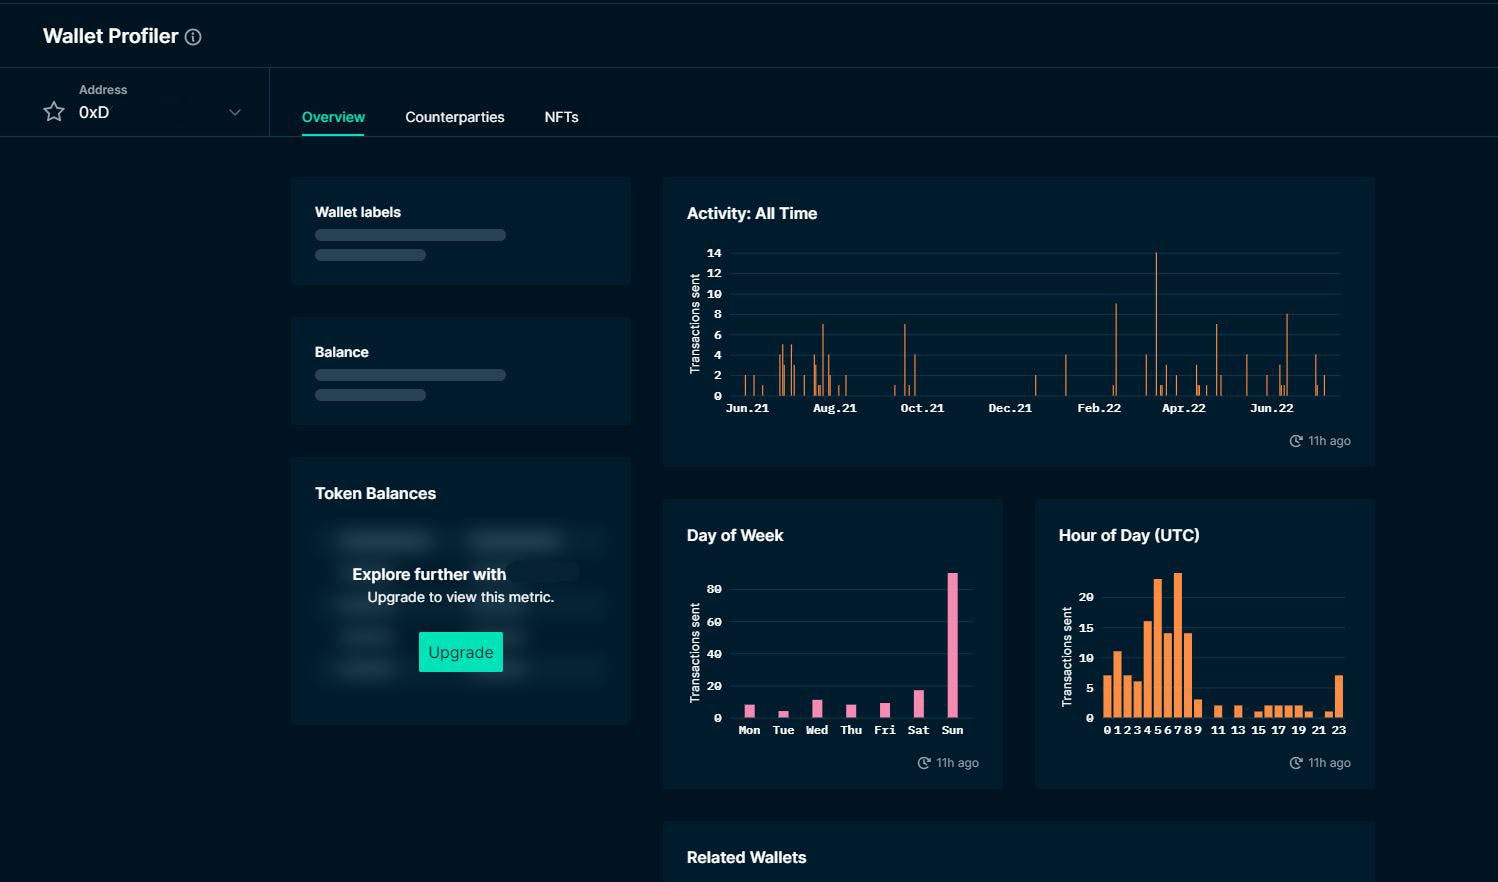
There are many services out there that analyze wallets and gather data on your activity. They can check when you use your wallet, how often you use it, who you interact with and more. While this is an amazing tool to help see trends and opportunities, it also leaves a lot of data available to nefarious actors. It comes down to choice. We should have options to choose some sort of privacy.
How does it work?
I created a little flow chart to help you understand the way it works.

- • (Public) You start off with your Ethereum wallet. You most likely funded it through a central exchange and like any wallet all transactions are viewable on the public ledger such as etherscan.io.
- • (Public) You then send your funds to the Aztec network smart contract
- • (Private) Once the funds arrive in the contract, you are free to send tokens to other users, send eth to a brand new generated wallet (sends back to L1 – public) or deposit in Defi protocols.
- o You can continue to use the network as much or as long as needed with privacy being the biggest priority.
- • (Public) Once done, you can exit the Aztec Network smart contract and join the public ledger again. By means of the same wallet you deposited with or by a brand new wallet of your choosing.
How to get started:
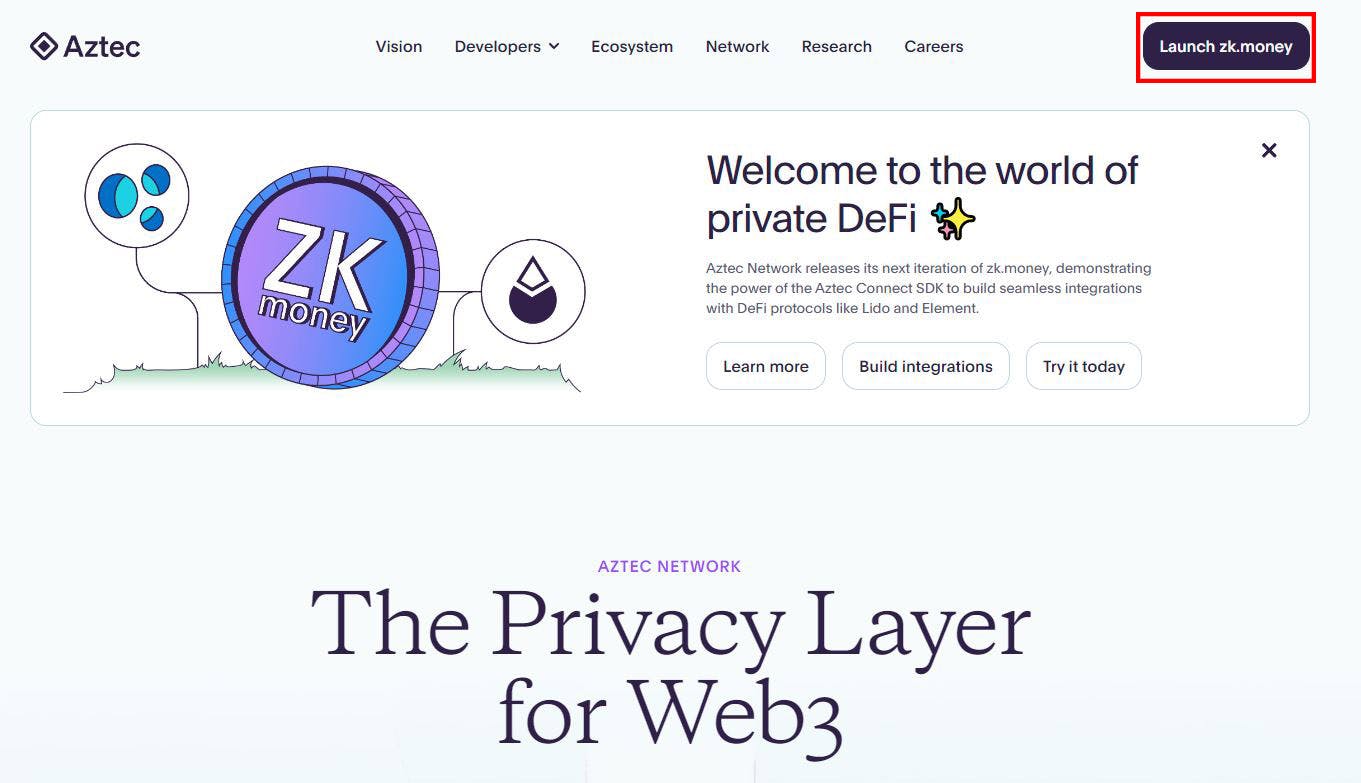
Head over to aztec.network
Click on the “LAUNCH ZK.MONEY”
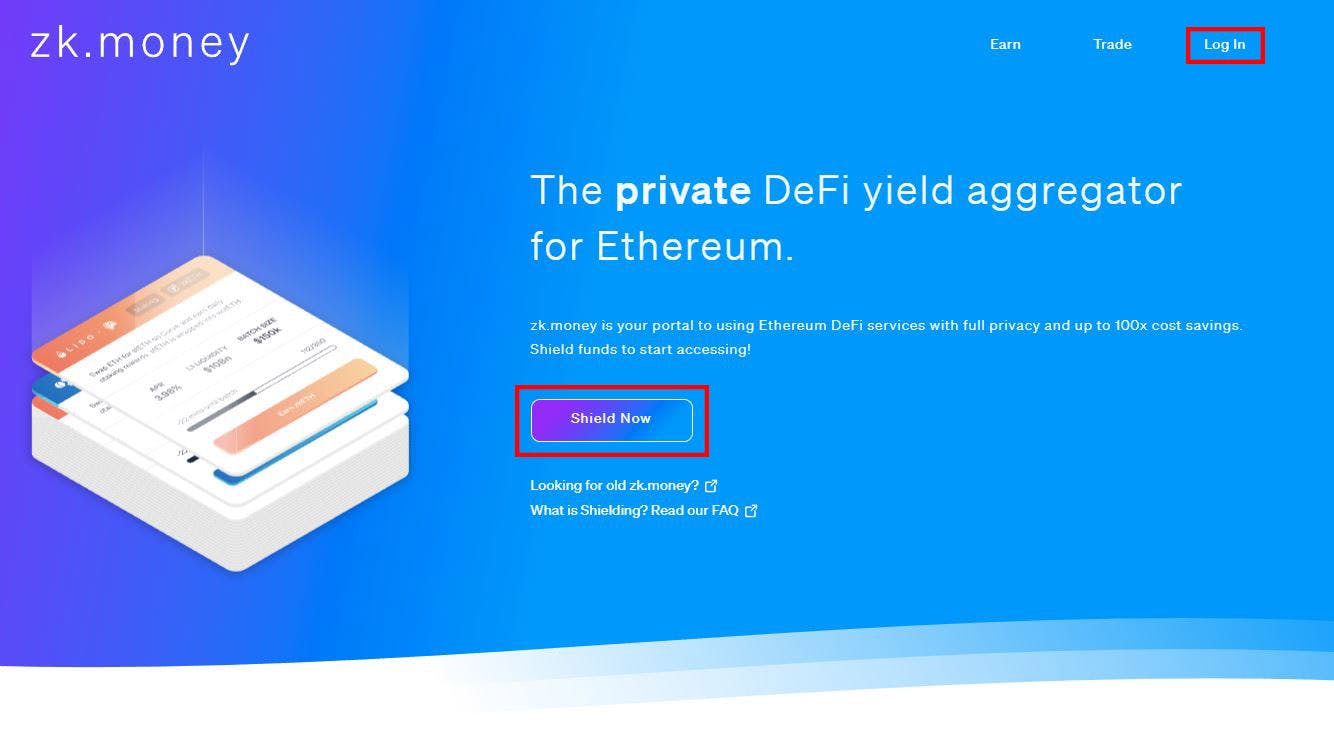
This will take you to another page zk.money
This may worry some new users as it is a different domain, this is fine and normal.
Go ahead and click on either “LOG IN” or “SHIELD NOW”
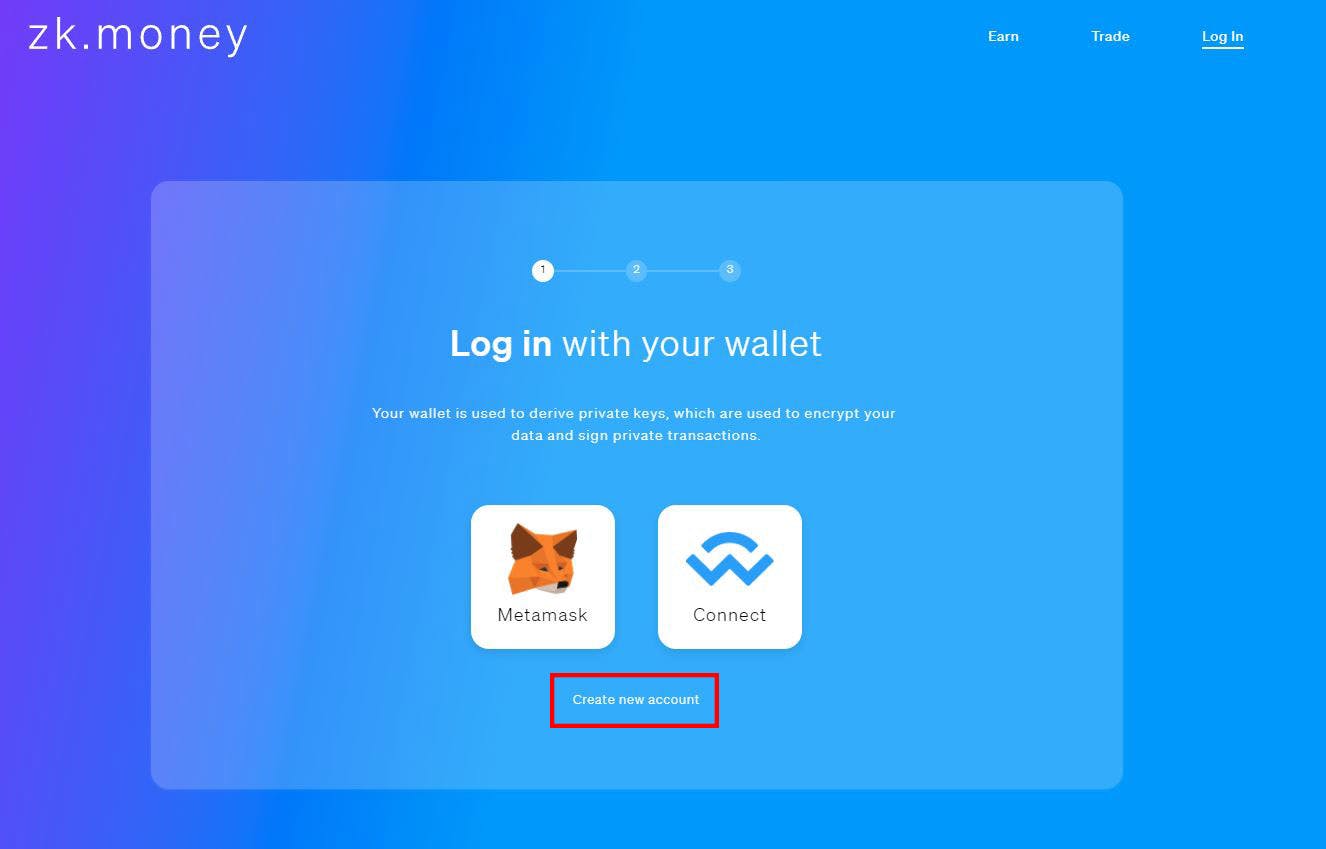
It will prompt you to Log In, but if you are a New User you will not have an account. Go ahead and click “CREATE NEW ACCOUNT”
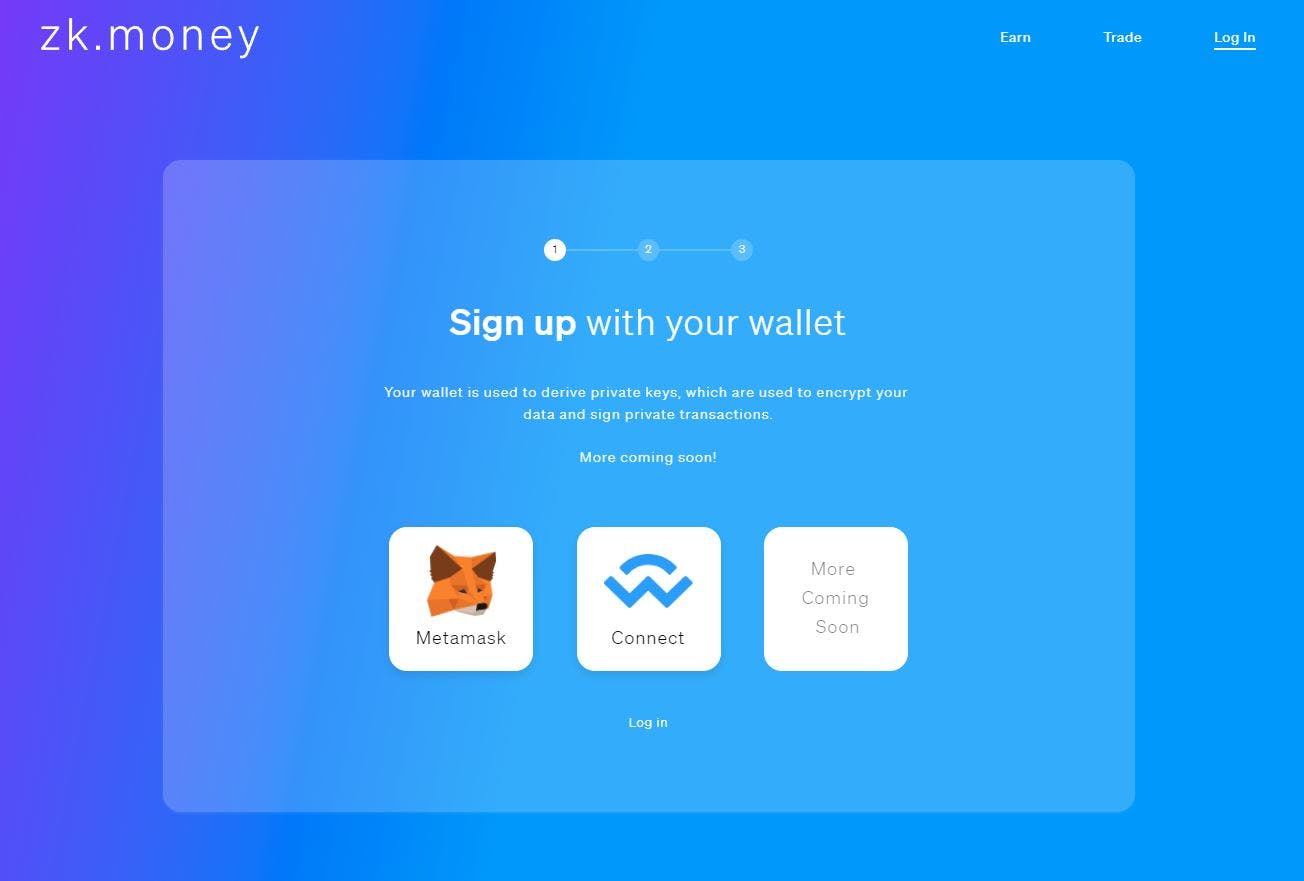
This will look very similar to the login. Go ahead and choose the wallet you want create your account with.
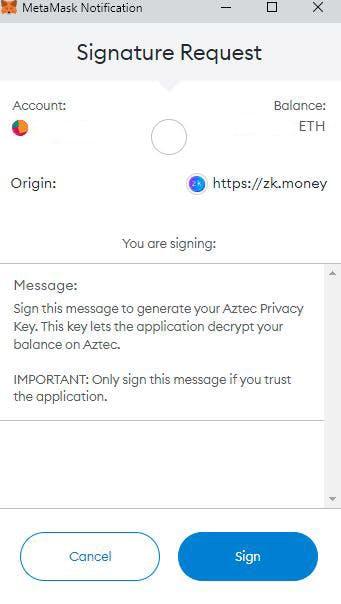
It will prompt you to sign with your wallet to process the transaction.
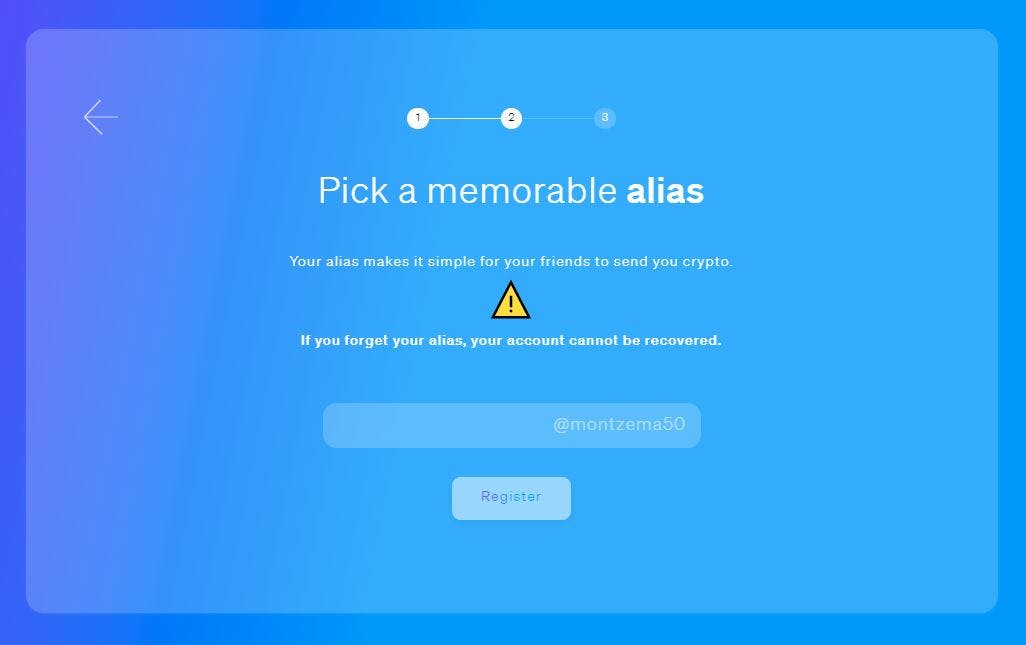
Once signed off, you will be prompted to create an Alias. Similar to a username. This is how others will be able to send you Eth/Tokens inside the Aztec Network as well.
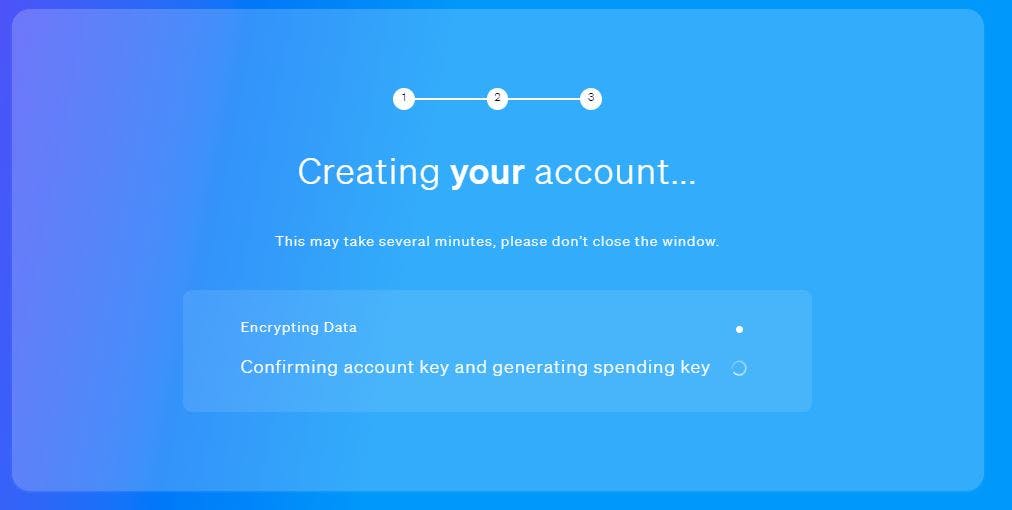
It will also prompt you to SIGN again with your wallet to create the account
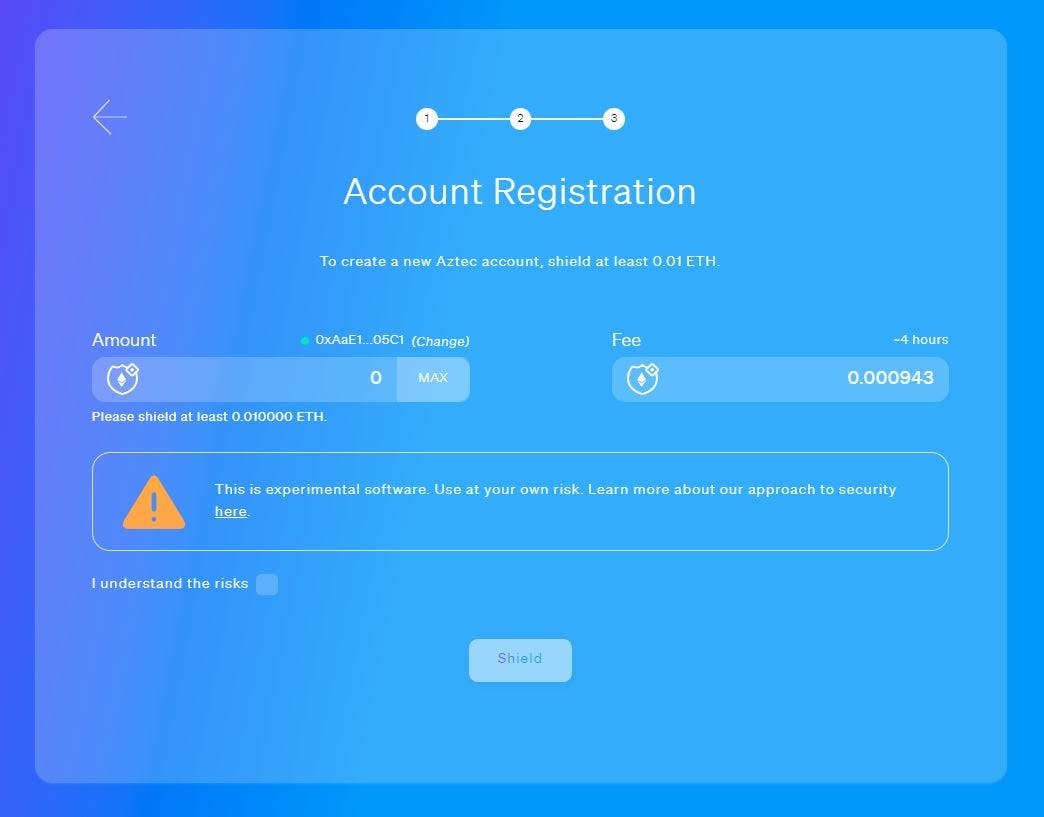
Once the wallet signature requirements are completed, it will ask you how much ETH you want to send to the smart contract for privacy. There is a MINIMUM of 0.01 ETH and there is a very small network fee to send the ETH to the contract. You will notice that above the Fee, there is a ~4 hours. This means that the TRANSFER OF ETH WILL NOT BE READILY AVAILABLE FOR ABOUT 4 HOURS.
Aztec Network uses rollups to batch transactions for a few reasons. Bulks your transaction with many that are the same (getting some privacy) and it makes the transaction cheaper for the user.
Check off the “I understand the risks” I’ll cover this in a bit Click on the “SHIELD”
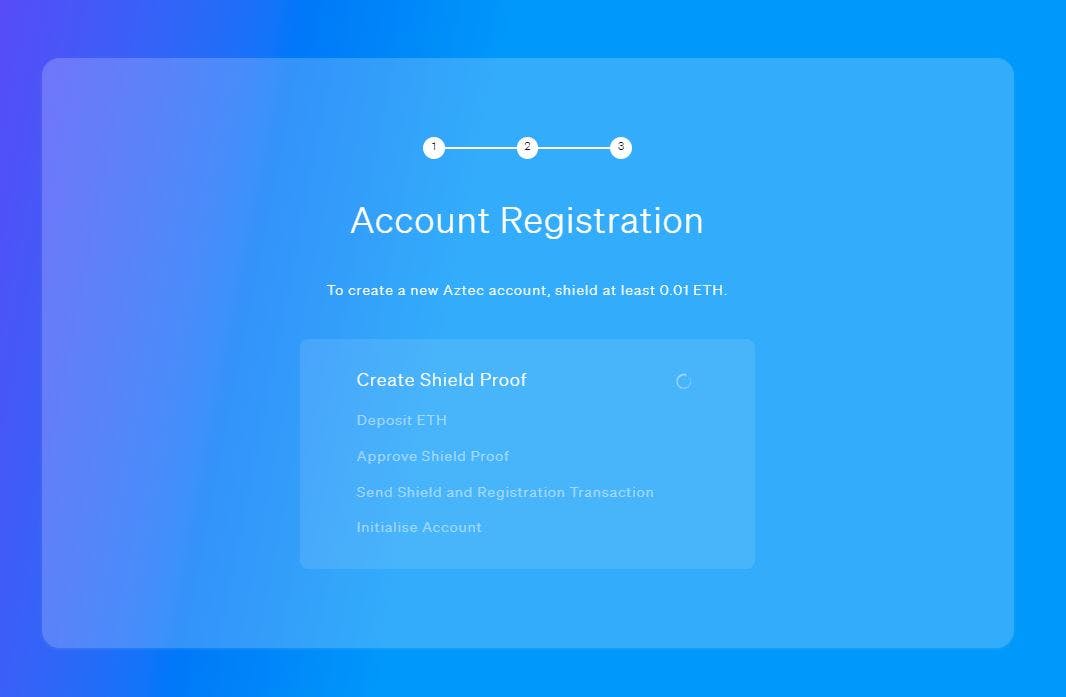
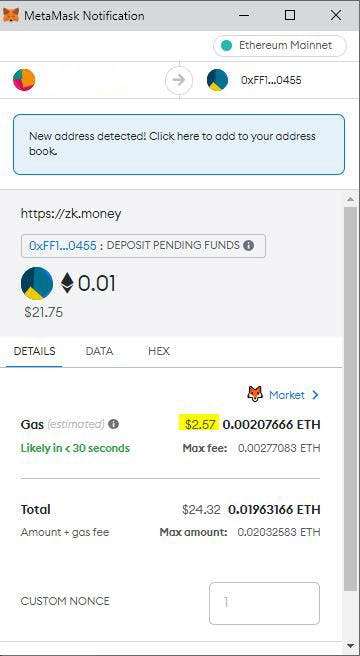
Account registration will begin and you will be prompted on your wallet to transfer funds to the Aztec Network Smart Contract. This is the moment where we start moving to from public transactions to private ones.
This takes a while for the transaction to go through, so be patient.
User Interface:
Once loaded up, you should see the estimate balance that you sent to the Aztec Network smart contract. Your username should be in the top right corner.
Please note that underneath your “Net Worth” you available balance should be $0. Remember when you got the estimation of the rollup was 4 hours? You will have to wait for that to complete before you have a usable balance
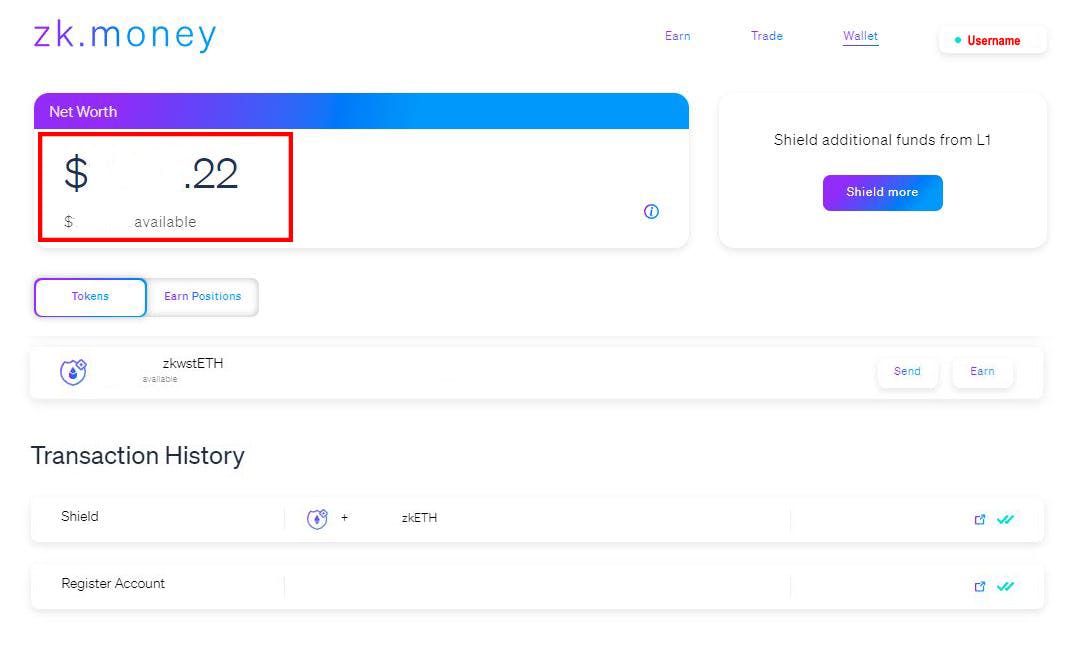

After some time, you should have your “available” balance updated. Once thing to note is, your ETH looks weird. It’s not ETH but zkETH. The Aztec Network Contract is wrapping your ETH to be usable in their platform. This is normal and can be claimed 1zkETH for 1 ETH at the time of this writing. Once you have established this, this is where the privacy begins. All transactions you do within the Aztec Network is “Shielded” from the outside use. It used a privacy technology that I won’t deep dive into this article, for the sake of the length of reading, but it uses technology similar to zCash.
You will notice, you have 2 options. SEND and EARN. Let’s dive in.
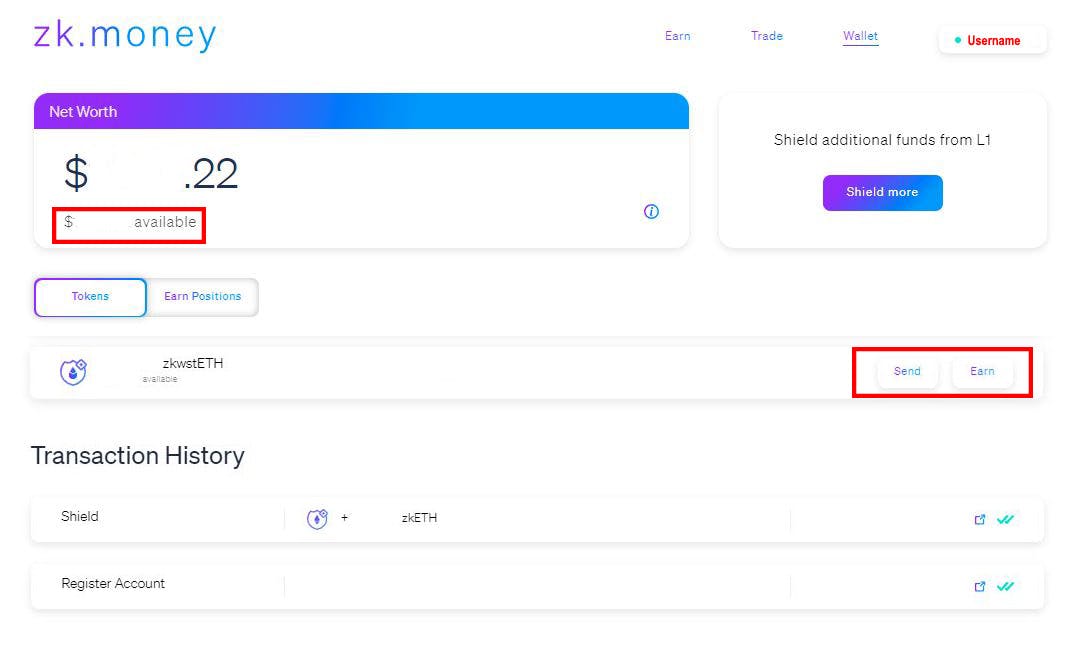
Sending to Another Wallet in Aztec Network:
When you click on “Send” a new window will pop up. There will be a few options to take in.
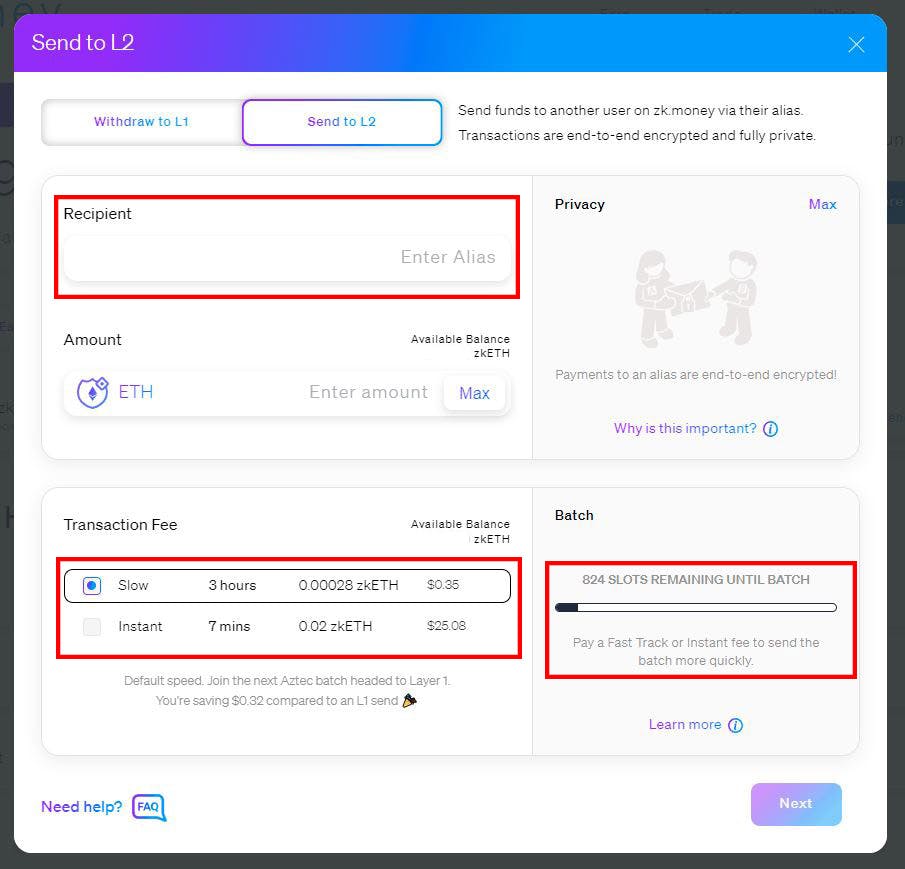
You can send Eth/tokens to another wallet within the Private Aztec Network to another Username. NOT A WALLET ADDRESS. Remember the username you created when you first setup your account?
This is how you will send to other Wallets/users within the Aztec network.
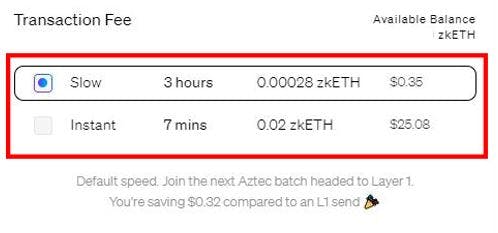
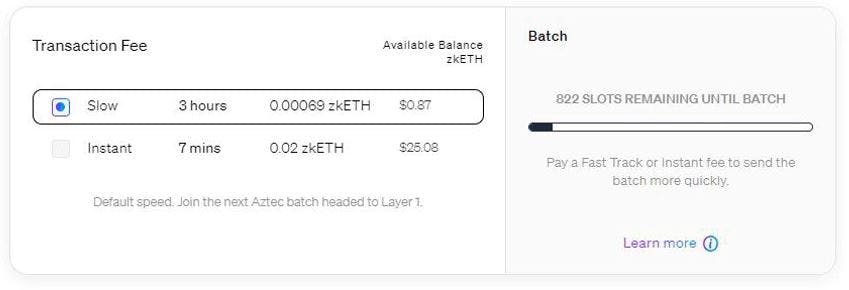
You also have the option of using the rollups (slower) or doing it instantly for a higher fee:
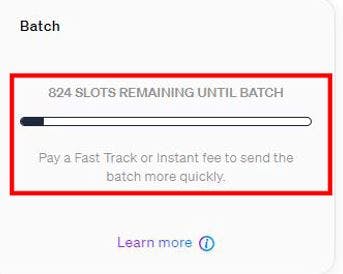
There is a small catch though. In order to keep these rollup fees low, Aztec Network does the transactions in batches so we all split the transaction fee costs. As long as there is space in the current batch, you will be included in the next batch.
Once you decide the amount and who you want to send to, you can hit next and sign away on your wallet to send your fund privately.
Funding a fresh Wallet Privately:
When you click on the “Withdraw to L1” tab on the top menu, you will see a new option interface. This is a very cool feature just on its own.
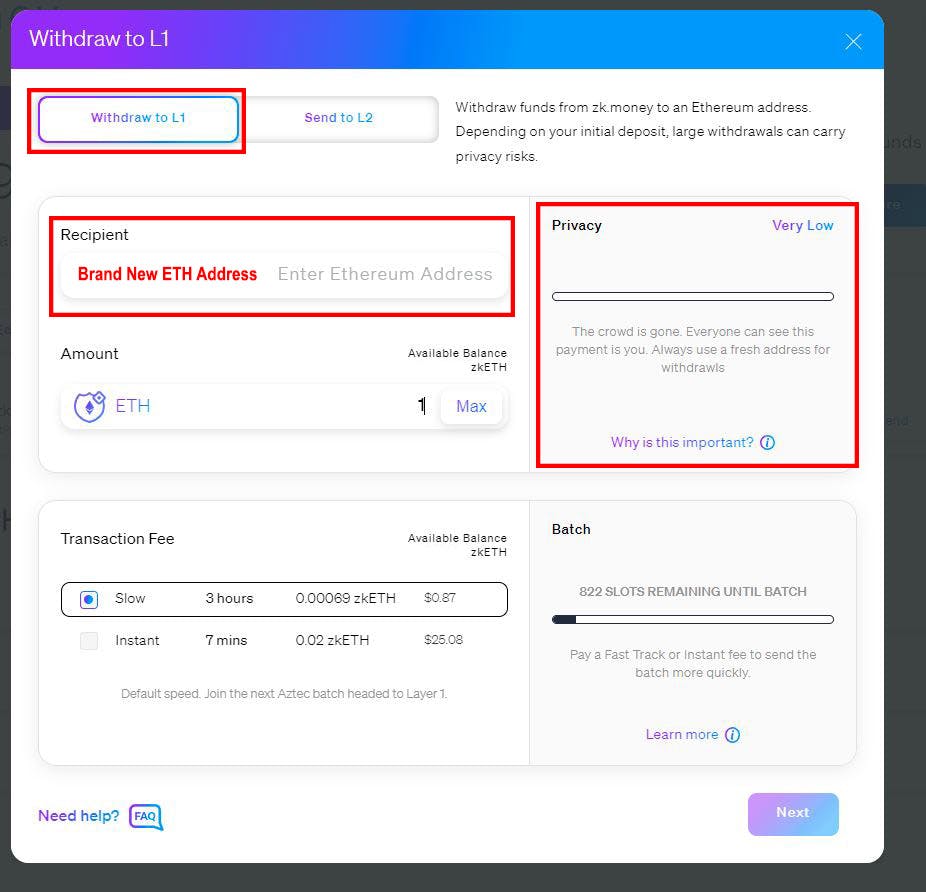
A little side track- When you create a brand new wallet, in order to fund it with gas to operate on the network the Eth must come from somewhere. Either you transfer it from a central exchange or it is sent from another wallet. Both of those options are traceable to an original source. When you fund a wallet from Aztec Network or Dapps like Tornado Cash, they come from the smart contract and make it much more difficult to trace giving you privacy.
NOTE: If you just create a new account from an existing Metamask, it is still tied to the original seed phrase. It has it’s own public and private key but shares the same seed phrase as any other accounts on that Metamask.
Anyways, you can send Eth to your original wallet that you sent from or you can create a brand new wallet and fund it this way:
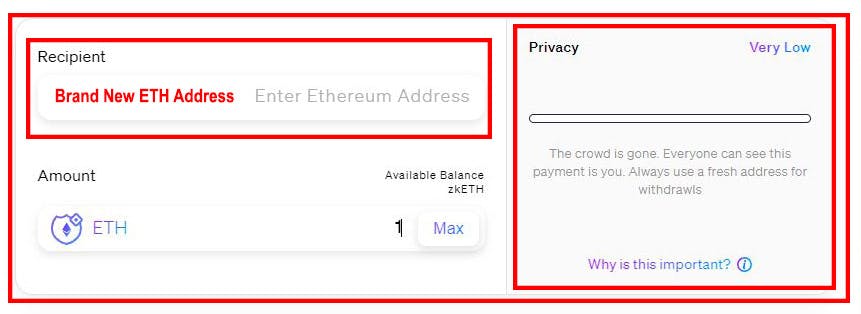
You will put in an eth address 0x… but a big thing to note is the amount of ETH you can send versus the amount of actual privacy you receive.
Example:
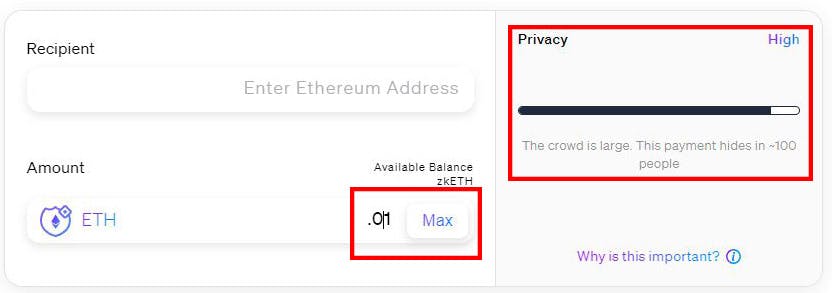
Another Example:
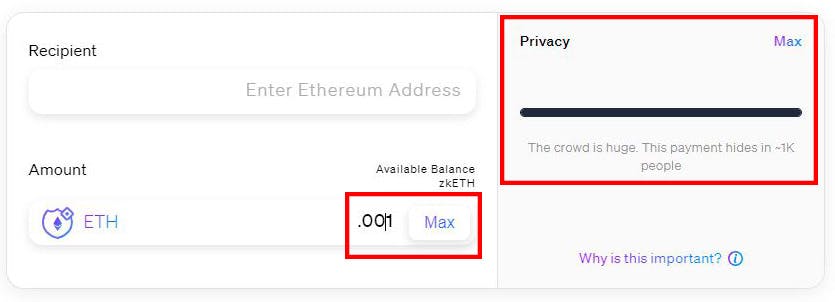
So, what’s happening here? Let’s break it down with an example. There are so many billionaires in the world. If a billionaire was trying to move a billion dollars in Eth privately on to the blockchain, you would be able to eliminate 99% of the wallets to a certain amount of people, right? What if that same wallet was trying to move 10 dollars? It would be impossible to distinguish who the person was because most people have at least 10-100 dollars in their wallets. The higher the amount, the less effective the shielding power of anonymity.
If you are patient, the fees can be very cheap to fund a new wallet. This feature alone is very powerful.
Depositing to DEFI – EARN:
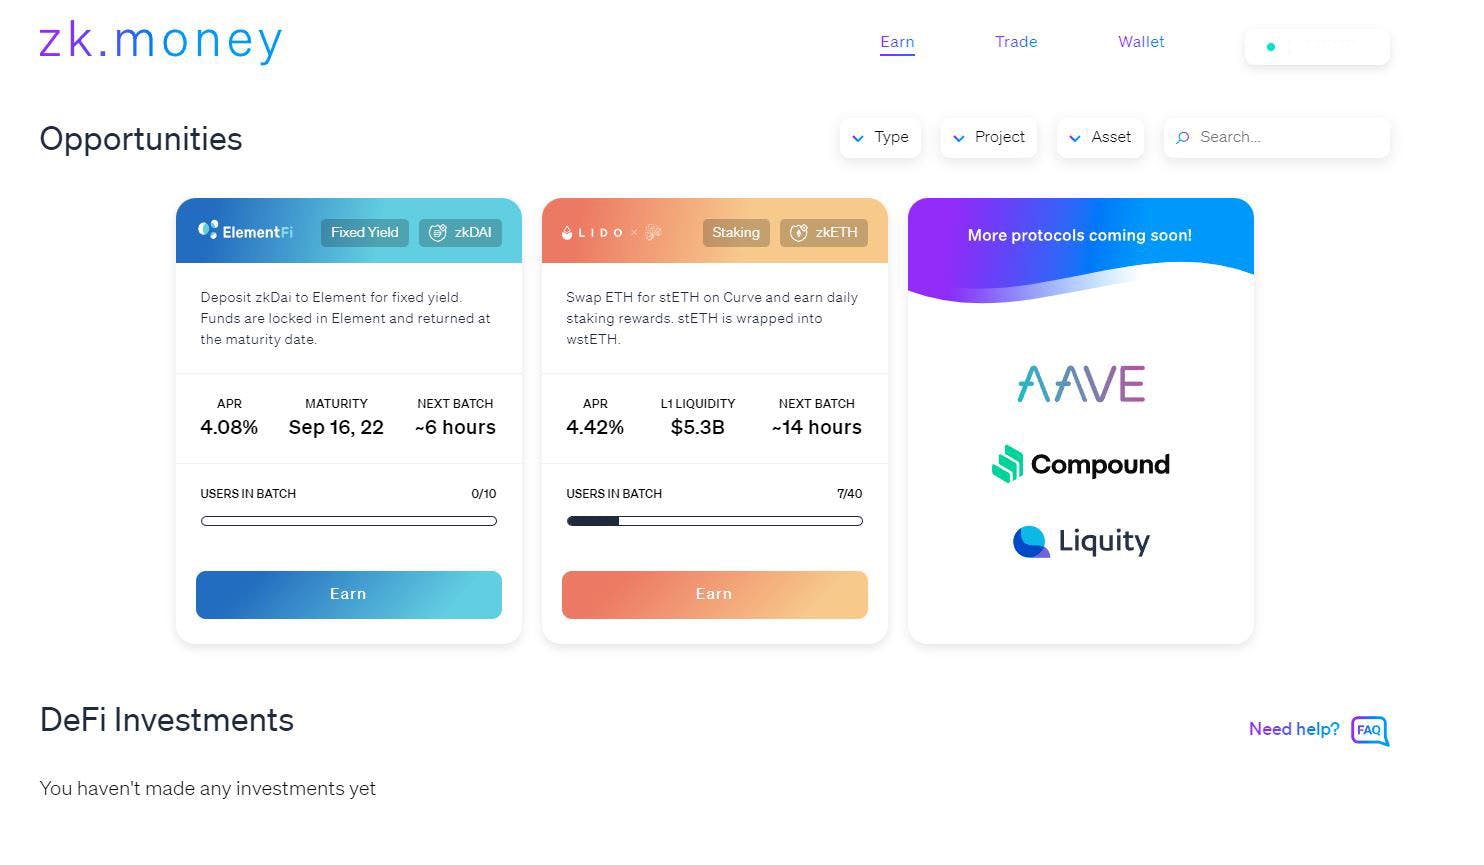
Coming back to the primary page, let’s visit the “EARN” page.
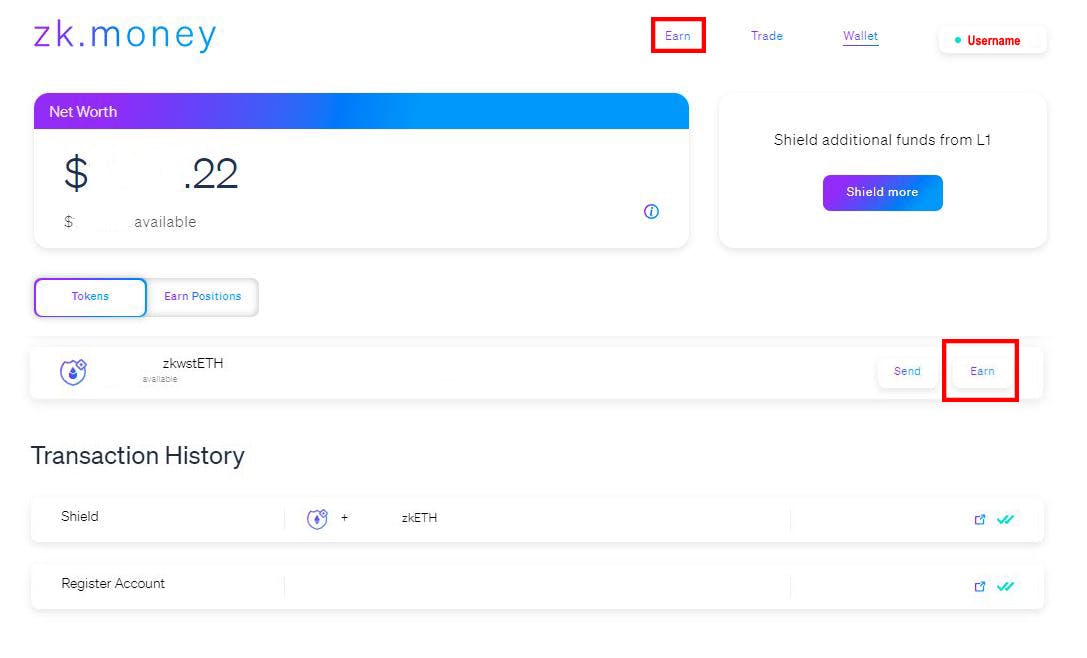
Currently, there are only two live options. ElementFi and Lido Finance.
Let’s dive into Lido Finance, as it takes zkEth (our wrapped ETH):
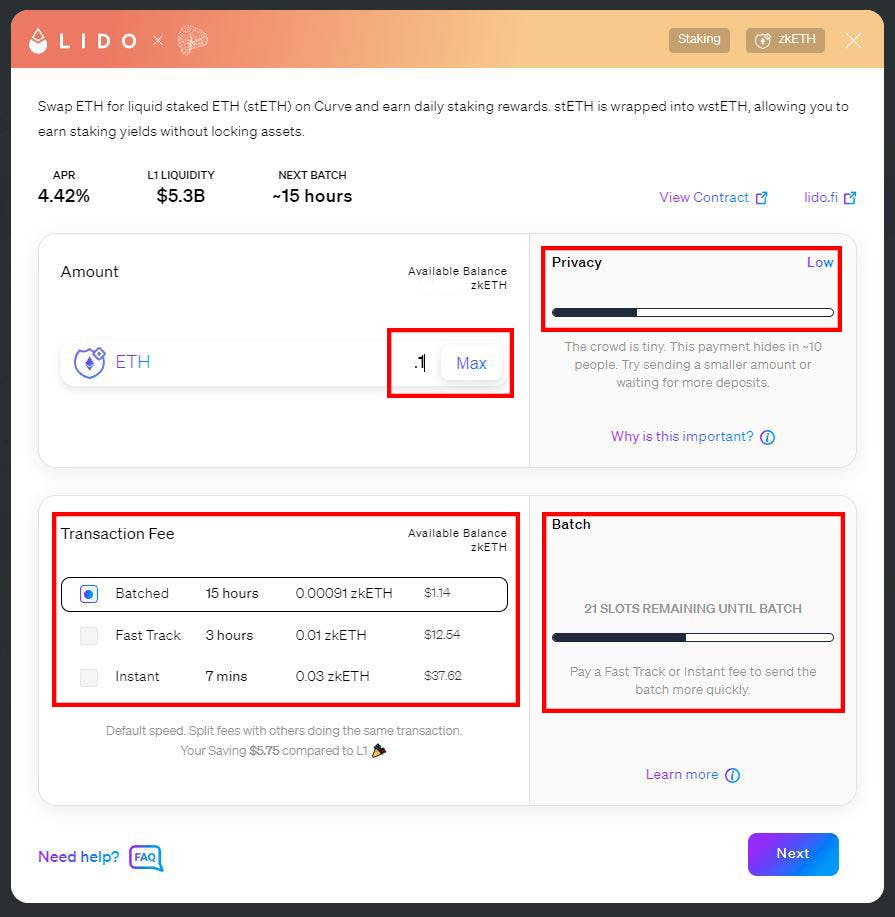
You see the same rules apply to the privacy of moving large amounts of Eth into staking onto a Defi platform. You choose the amount you want to deposit and decide on how patient you are to deposit.
I went ahead and deposited some Eth into the platform, I got a prompt to sign the transaction on Metamask and receive this prompt.
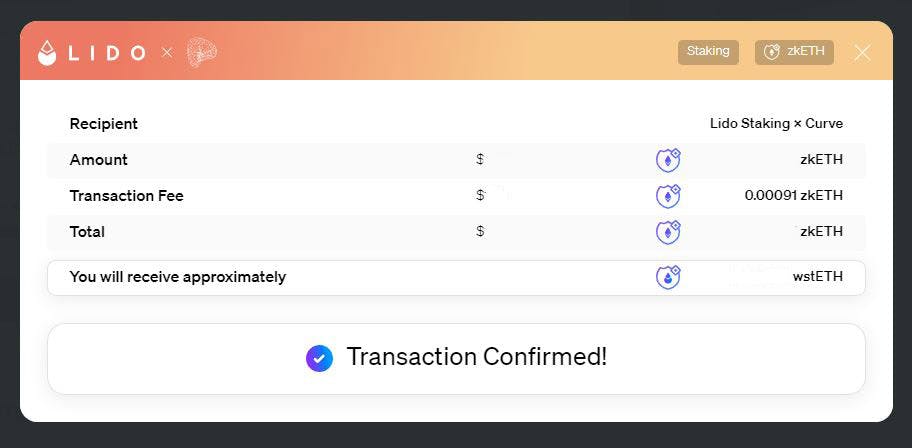
Now I will have to wait about 15 hours for the batch to complete and my Eth will have been staked on the platform.
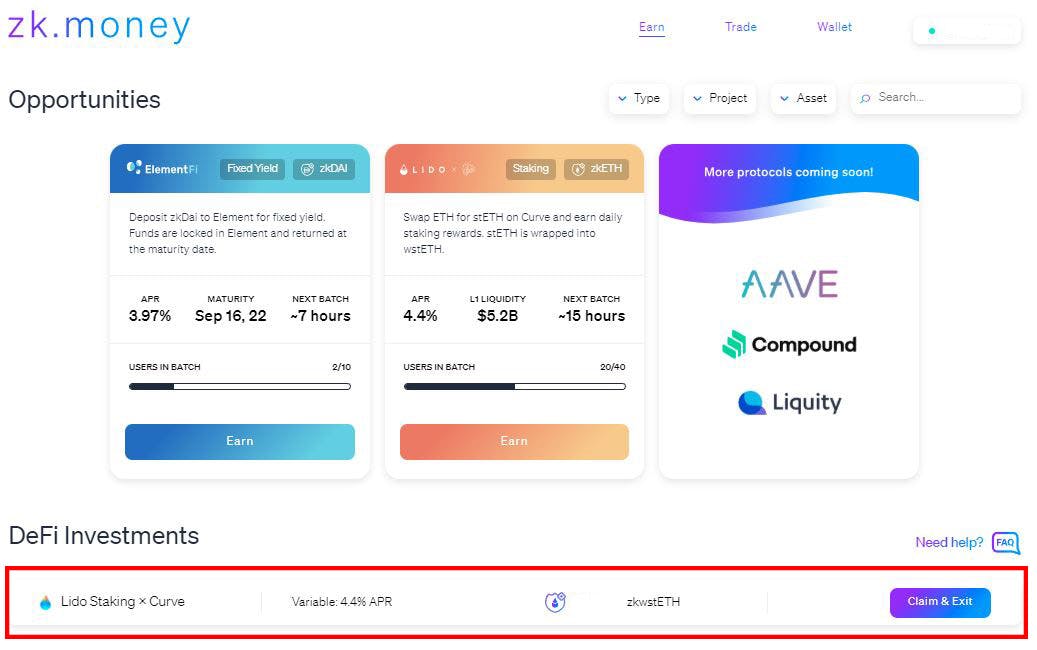
Once the transaction batch has been settled (15 hours later), you will see your status on the bottom of your “EARN” page. To withdraw this balance, you will hit “Claim & Exit” and start the process all over again.
Let’s go ahead and check out Element Fi:
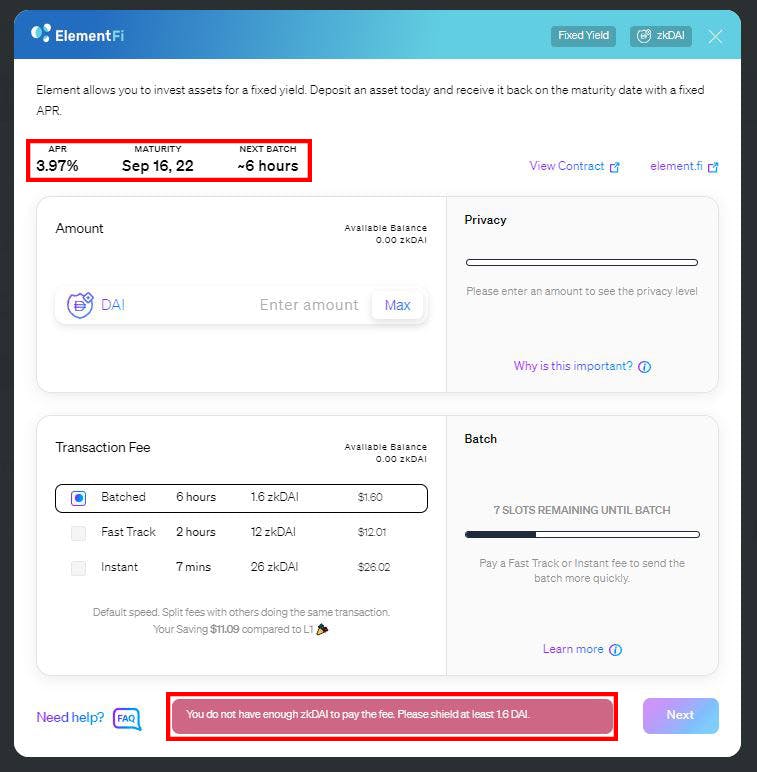
Right off the top, you will notice that is has a Maturity Date. This means that the withdrawals will not be possible until that date (This is how element finance works on Mainnet as well). You will also notice that we do not have any Dai/zkDai. That is because we haven’t bridge any to Aztec Network.
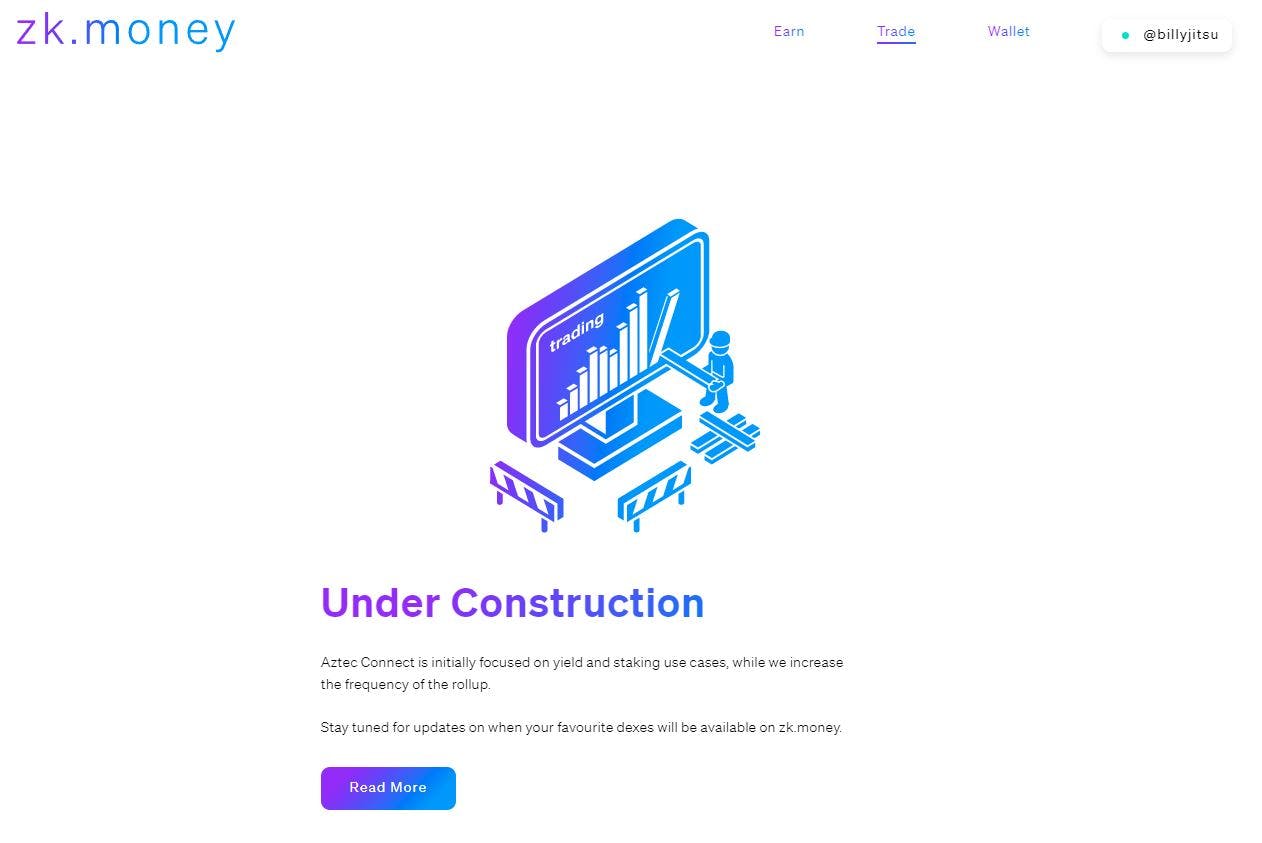
Unfortunately, the “Trade” option is not available yet:
So we will have to send DAI to Aztec Network.
Back on the “Wallet” primary page, we will select the “SHIELD MORE” button
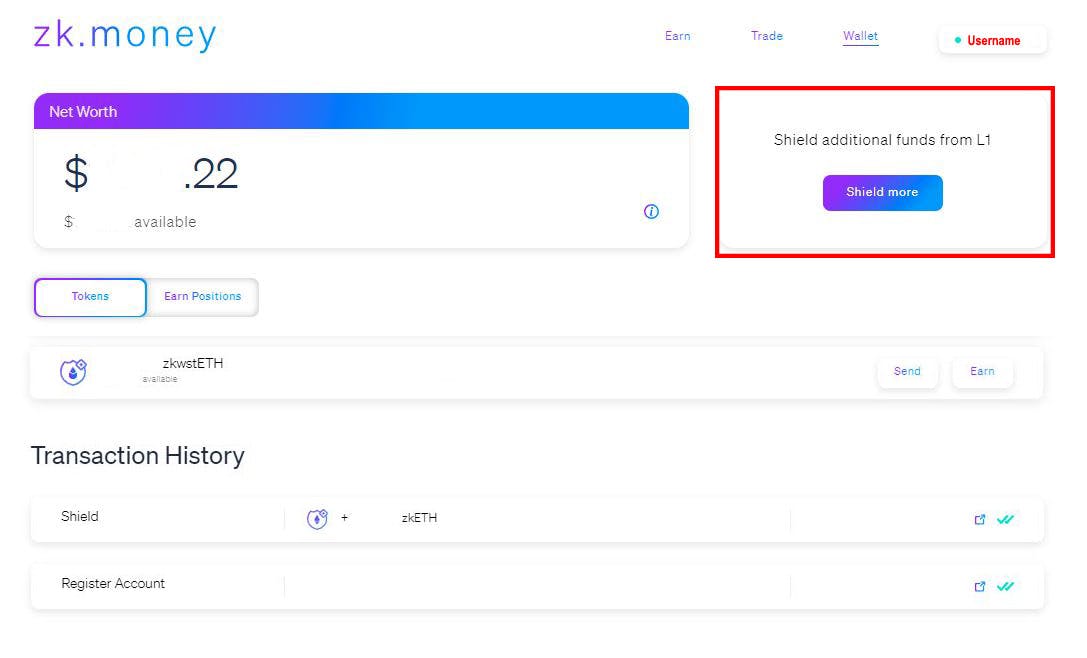
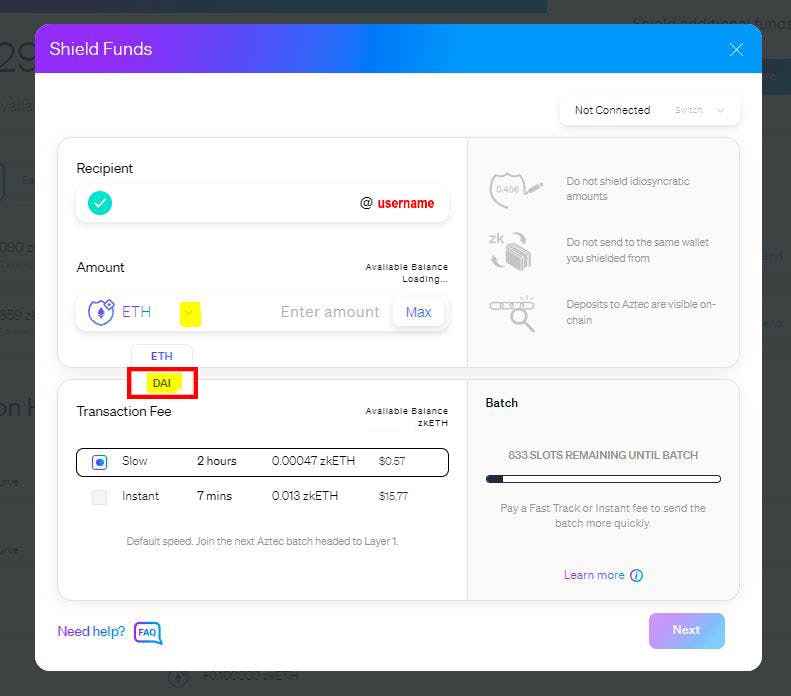
You will verify that your username will be the recipient of the funds and make sure to click the down arrow next to the Eth option and select DAI stable token.
By now, you are familiar with the process. Once you have your Dai synced, about 2 hours later, you will then be able to deposit on ElementFi.
Viewing Transactions:
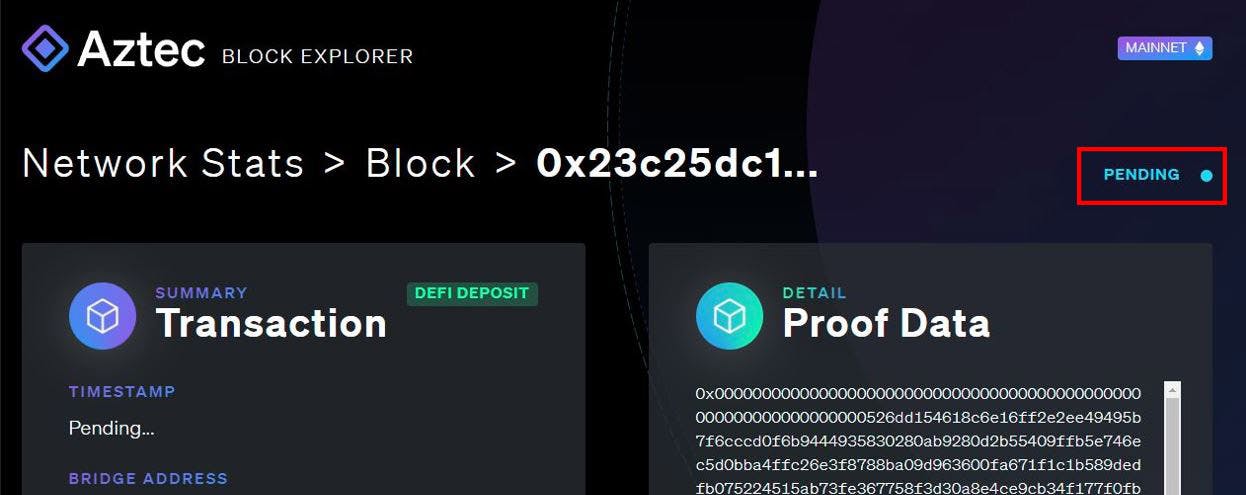
You can view internal transaction on the Aztec Block explorer, due to the nature of the length of rollups, you will be pending for many hours until the batch is completed (or unless you paid for the instant).
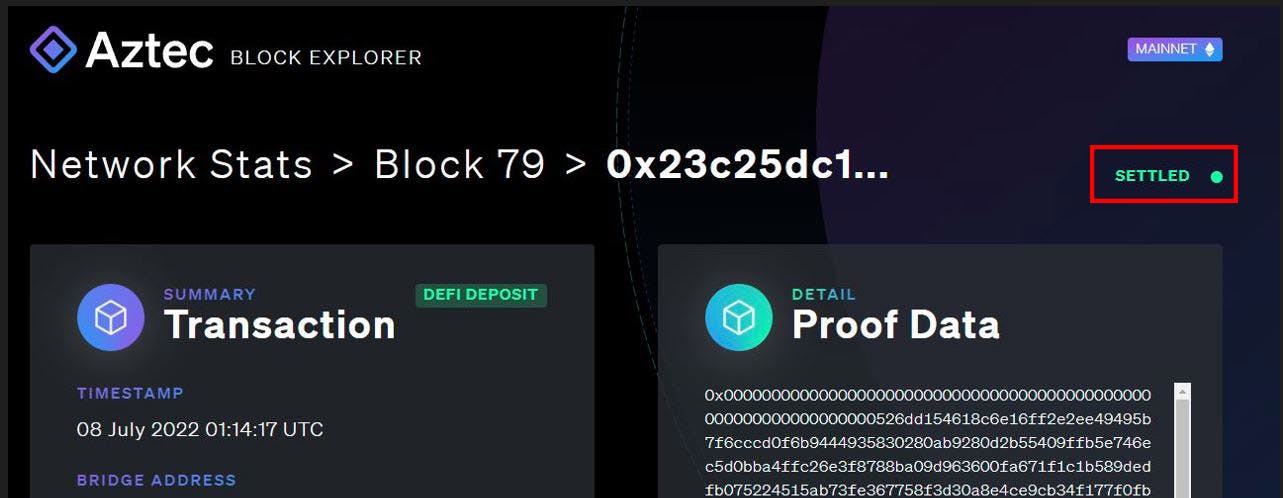
Once the batch complete, you will see the settled status.
This is a general overview of the Aztec Network. There is definitely more to come in the future and something to be excited about.
This process does come with some risks though.
Risks:
The Aztec Network runs off a smart contract. Just like bridge contracts, there is a chance for exploitation and funds getting hacked. There is a current limit of 5 Eth and 10,000 DAI to be sent at a time but there is always a risk.
Currently zk-money is powered by Aztec L2 Rollup. They are currently the sole provider of the rollup so not as decentralized as we would like at this time but plans to add more providers.
Closing:
Thanks for taking the time to read this article, I felt it was a bit lengthy but with new releases and new technologies trying out new platforms can be intimidating and scary at times. Nobody wants to lose money with a simple mistake, so my goal was to try to make it as clear as possible and help you understand how the protocol works. If you found this helpful, I would appreciate a share of this link to zk money: zk.money/?alias=billyjitsu I really don’t know if I get anything for it, but I figure why not. Anyways, keep on exploring and now you can do it privately.
