


The RainbowKit + WAGMI guide I wish I had
A guide about going from Hardhat, to deploying and verifying to connecting it to the frontend with Rainbow and Wagmi


The RainbowKit + WAGMI guide I wish I had
Please note - This tutorial is for Wagmi version 5 and previous versions. Will update to 7 soon.
A little history
As a developer in the blockchain space, my path may be different than most. My passion to code and build things came from being in the crypto space and seeing all the things that could be achieved. I jumped right into wanting to build blockchain Dapps with solidity, the problem is in order for most people to use my deployments was I needed a front end and being able to support the plethora of wallets that are available now.
My developer path was a bit reverse than many: Solidity -> Javascript -> HTML ->CSS
My focus was on do what you need to do to build it, don't get lost on chapter 10 & 11 when all I need is on chapter 8.
You can only imagine the frustration caused by this path, especially when trying to perform a simple task and not finding a straight answer for it.
Reading confusing docs and outdated examples where the bane of my developer existence which is why I'm writing this guide. Hopefully to somebody out there, I've saved you weeks of frustration.
This guide goes past just connecting a wallet, we are going to:
- Write a small Solidity token code - fast
- Deploy to a network and verify the contract
- Connect to a deployed contract
- Write to a function using Wagmi
- Send a payment to a function
- Read a function
- Wait for transaction to complete
Tools that I'm using for this tutorial - My Stack:
I somewhat started with a blank slate with coding. My stack was heavily influenced by the availability of tutorials and resources that I could find.
- Next.js - Web Framework (I started with React but bit the bullet to move to Next)
- Tailwind - CSS Framework
- WAGMI + RainbowKit - Connection to the blockchain and wallets
- VSCode - IDE
- Hardhat - Solidity Framework
- Hardhat-Etherscan Plugin (To verify my contract)
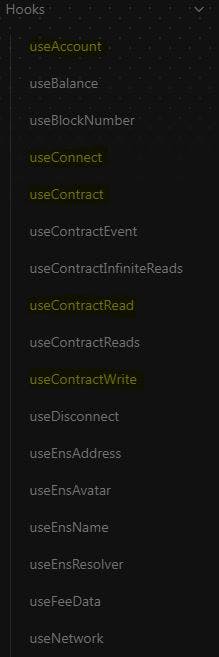
WAGMI - What is it?
In short, it is a set of amazing set of hooks built to make your connection to the blockchain smoot and just cleaner. It is based of Ethers.js, the most popular Ethereum library at this time.
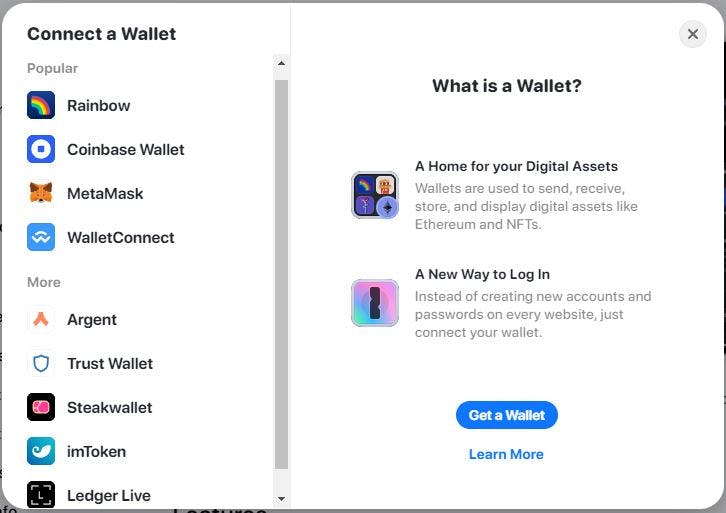
RainbowKit - What is it?
Rainbow kit is by far the most easy to use Wallet connection tool out there. I've been frustrated with web3modal, web3react and other kits. Rainbow kit was the first toolset that worked the first time I tried it. With support for Metamask (injected connector), WalletConnect, Coinbase Wallet (and Rainbow Wallet) right on installation we've covered a majority of most users in the space.
Let's get to coding
The Back End
Solidity
A simple token contract
- Mints the deployer 200 tokens upon deployment (in constructor)
- Ability to mint tokens to an address with the amount
- A faucet for users to claim a token over a set amount of time
- Ability for users to purchase tokens - requires a payment
- A way to withdraw the native token from the contract
// SPDX-License-Identifier: MIT
pragma solidity ^0.8.7;

import "@openzeppelin/contracts/token/ERC20/ERC20.sol";
import "@openzeppelin/contracts/access/Ownable.sol";

contract MyToken is ERC20, Ownable {

    //Create a variable for our faucet
    uint256 drip = 1 ether; // ether =  1 * (10 ** 18)

    //Mapping to Keep Track of the Time Each Wallet Requests
    mapping (address => uint256) public addressTime;


    constructor(string memory _name, string memory symbol) ERC20(_name, symbol) {

        //Pre-Mint the Deployer 200 Tokens
        _mint(msg.sender, 200 * 10 ** decimals());
    }

    //Users can mint tokens to a specified address and the amount they want to send
    function mint(address to, uint256 amount) public  { // << Removed the onlyOwner Modifier to everybody can try
        _mint(to, amount);
    }

    //Users can claim a token from my token faucet - get users to keep coming back to your site
    function faucet() external {
        // Requirement to make each wallet wait a specific amount of time
        require(addressTime[msg.sender] < block.timestamp, "need to wait more time");
        //Let the user claim a token
        _mint(msg.sender, drip);
        //Update the address time, to make them wait the set amount of time
        addressTime[msg.sender] = block.timestamp + 1 minutes;  // Can use seconds, minutes, hours, days, etc
    }

     // Buy Tokens
     function buy (uint256 _amount) external payable {
        //Make sure they pay something
         require(msg.value > 0, "send money");
         _mint(msg.sender, _amount);
     }

    //Withdraw any Eth from the contract
     function withdraw() external onlyOwner {
        payable(msg.sender).transfer(address(this).balance);
    }

}
I'm not going to deep dive on setting up your VSCode/Hardhat environment as this will make this tutorial way too long but I will cover some bits.
My Deployment script looks like this:
const hre = require("hardhat");

async function main() {

  const name = "Billyjitsu";
  const symbol = "BJT";


  const Token = await hre.ethers.getContractFactory("MyToken"); //Name of my contract
  const token = await Token.deploy(name, symbol);

  await token.deployed();

  console.log("Token deployed to:", token.address);
  const receipt = await token.deployTransaction.wait();
  console.log("gasUsed:" , receipt.gasUsed);
}

// We recommend this pattern to be able to use async/await everywhere
// and properly handle errors.
main()
  .then(() => process.exit(0))
  .catch((error) => {
    console.error(error);
    process.exit(1);
  });
I left the code very generic in the constructor, so anybody can make their own token name:
constructor(string memory _name, string memory symbol) ERC20(_name, symbol)
You can deploy this contract to ANY EVM compatible chain. Ethereum Mainnet, Goerli Testnet, Optimism, Arbitrum, Gnosis Chain, etc. As long as you have the RPC URL to deploy to that network. This is what my .env file looks like (obviously my API and keys are removed)
MAINNET_RPC_URL='https://eth-mainnet.alchemyapi.io/v2/API KEY'

ROPSTEN_URL = "https://eth-ropsten.alchemyapi.io/v2/API KEY"
KOVAN_RPC_URL='https://eth-kovan.alchemyapi.io/v2/API KEY'
RINKEBY_RPC_URL='https://rinkeby.infura.io/v3/API KEY'

POLYGON_RPC_URL = 'https://polygon-mainnet.infura.io/v3/API KEY'
MUMBAI_RPC_URL = 'https://polygon-mumbai.infura.io/v3/API KEY'

GNOSIS_RPC_URL = 'https://rpc.gnosischain.com/'

PRIVATE_KEY = "Literally your private key"

ETHERSCAN_API_KEY = "API from Polyscan"
I will be deploying to Mumbai for this tutorial, hence why I have the POLYGONSCAN API Key.
This is what my "hardhat.config.js" looks like:
require("@nomiclabs/hardhat-waffle");
require('dotenv').config()
require("@nomiclabs/hardhat-etherscan");  // << What we will use to verify our contract

task("accounts", "Prints the list of accounts", async (taskArgs, hre) => {
  const accounts = await hre.ethers.getSigners();

  for (const account of accounts) {
    console.log(account.address);
  }
});


module.exports = {
  solidity: {
    compilers: [
      {
        version: "0.8.7",
        settings: {
          optimizer: {
            enabled: true,
            runs: 200,
          },
        },
      }
    ],
  },

  networks: {

    hardhat: {
      chainId: 1337
    },
    mainnet: {
      url: process.env.MAINNET_RPC_URL,
      accounts: [process.env.PRIVATE_KEY],
      saveDeployments: true,
    },
    mumbai: {
      url: process.env.MUMBAI_RPC_URL,
      accounts: [process.env.PRIVATE_KEY],
      saveDeployments: true,
    }
  },
  etherscan: {
    apiKey: process.env.ETHERSCAN_API_KEY
  }
};
In my VSCode I run the following script: (my deploy script is called "deploy.js")
npx hardhat run scripts/deploy.js --network mumbai
Once it is deployed, I get a return of information stating the contract address and the amount of gas used to deploy the contract (good for calculating costs for Mainnet deployments)
Token deployed to: 0xAfCF939f2870fc82920058b147A8ff4db98803a5
gasUsed: BigNumber { value: "982853" }
If we head over to mumbai.polygonscan.com, we can check the deployment: mumbai.polygonscan.com/address/0xAfCF939f28..
We will see that our contract is not verified... gross:
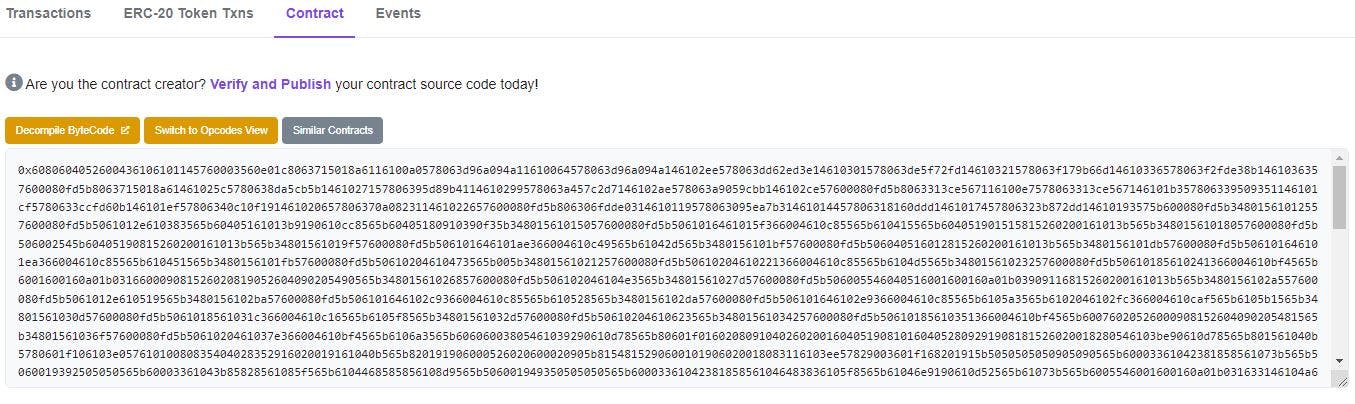
We could click Verify and publish and paste down some flattened code:
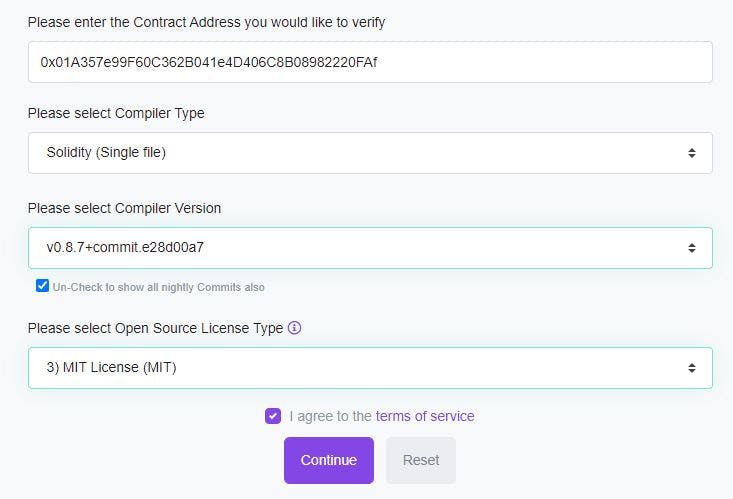 Flatten in Hardhat with this command ("flatten.sol" is the new file you are sending the flattened files to)
npx hardhat flatten > flatten.sol
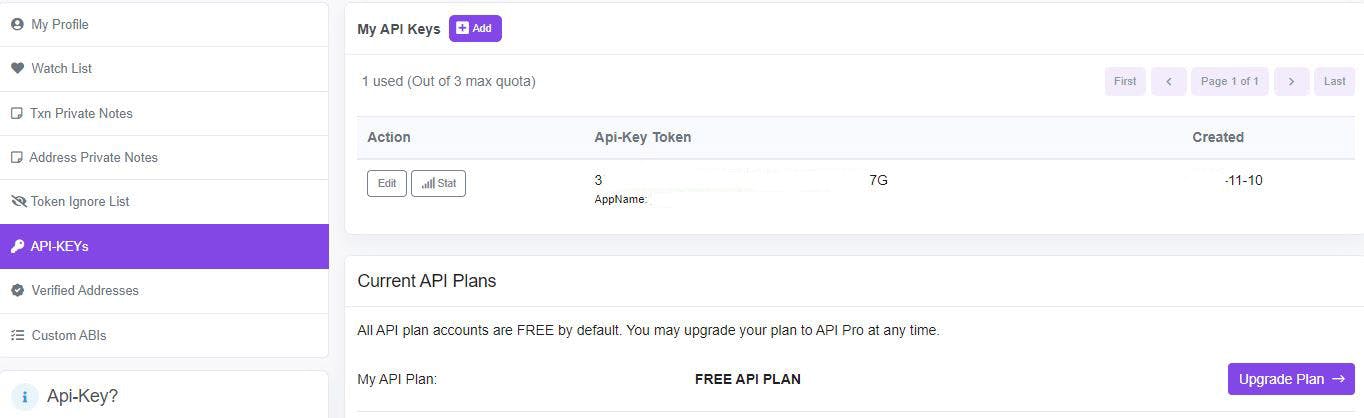
This technique may be ok, but not very efficient. This is where the POLYSCAN API comes in. Head over to polyscan.com and sign into your account (or make one) and then create your API Key. Copy than and paste it into your .env file.
ETHERSCAN_API_KEY = "API from Polyscan" //<<< The quotations stay!
We will be utilizing this plugin:
require("@nomiclabs/hardhat-etherscan"); // << What we will use to verify our contract
One more tip! We are just about ready to verify our contract from the Hardhat CLI. You can do it this way. (The network, The contract address, The Arguments in the constructor)
npx hardhat verify --network mumbai 0xAfCF939f2870fc82920058b147A8ff4db98803a5 'Billyjitsu', 'BJT'
This works when you only have a few arguments in your constructor. When you have 4 or more arguments and or complex string arguments this approach does not work. My practice now is to make an "arguments" files called "arguments.js" It sits in the root of my Hardhat directory and looks like this:

module.exports = [
    "Billyjitsu",
    "BJT",
];
Now, I have have a very large list for more complex arguments without worrying about the limitations of the Hardhat CLI. I can now call the arguments like this:
npx hardhat verify --network mumbai 0xAfCF939f2870fc82920058b147A8ff4db98803a5 --constructor-args arguments.js
And there we go! Successfully verified:
Successfully submitted source code for contract
contracts/Token.sol:MyToken at 0xAfCF939f2870fc82920058b147A8ff4db98803a5
for verification on the block explorer. Waiting for verification result...

Successfully verified contract MyToken on Etherscan.
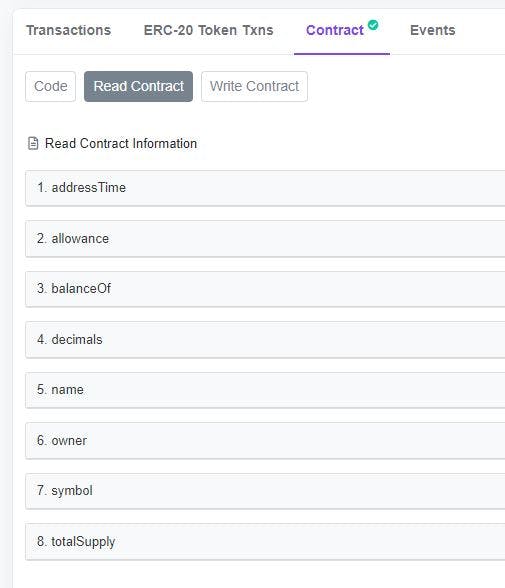
We can now interact with the contract on the Blockchain:
We are almost ready to start working on our Front End. We need to get a copy of the abi file to use.
We can get this 1 of 2 ways.
ONE:
Since we wrote the contract ourselves, the abi file is sitting in our "artifacts" folder of our VSCode.

We can pull a copy of the abi array from "[" to the last "]" (it's pretty large) or we can grab the entire file (this includes the bytecode at the bottom of the file) and when we import the file we choose a sub object. Example: " import.abi " (I will expand on this later in the front end)
TWO:
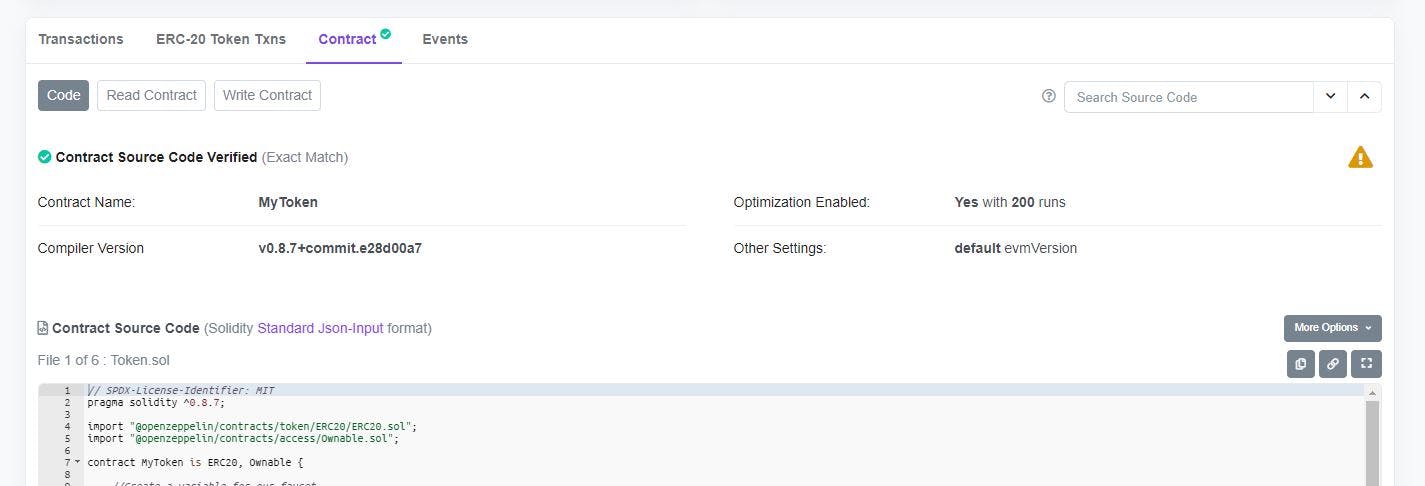
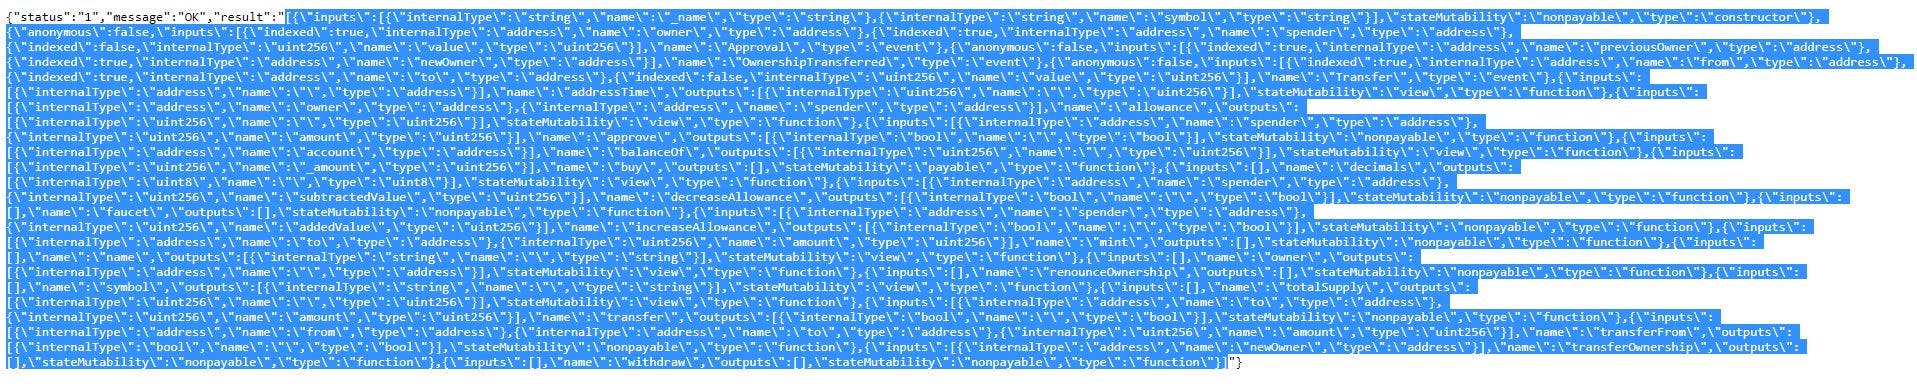
We didn't write the code ourselves and need to pull it from the block explorer:
When you click on "Contract" and select "Code" you can review all the code used to write the Dapp. If you scroll down towards the bottom, you will see the ABI for the code.
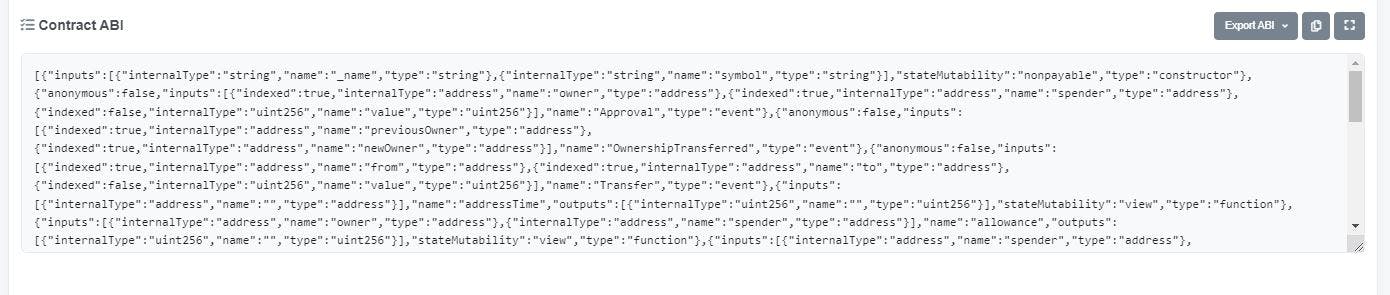
I like to export it in JSON format (sorry for highlight - wanted to show what to copy):

Now we can start working on the Front End of this Dapp!
The Front End
Setting up our next.js framework
We are going to start up our front end with create next-app
yarn create next-app
It will prompt you to name your project/folder:
What is your project named?
Once that is completed, we can go ahead change directory
cd yourFolderName
Let's install tailwind (or any CSS framework you like), tailwind has a great instructional on how to get started here tailwindcss.com/docs/guides/nextjs for more details.
yarn add -D tailwindcss postcss autoprefixer
npx tailwindcss init -p
Make sure to update your tailwind.config.js and your globals.css file (based on the link just above - don't want to clutter this tutorial anymore than I have to). Once complete, let's make sure the project is working
npm run dev
We should get the starter page on localhost:3000
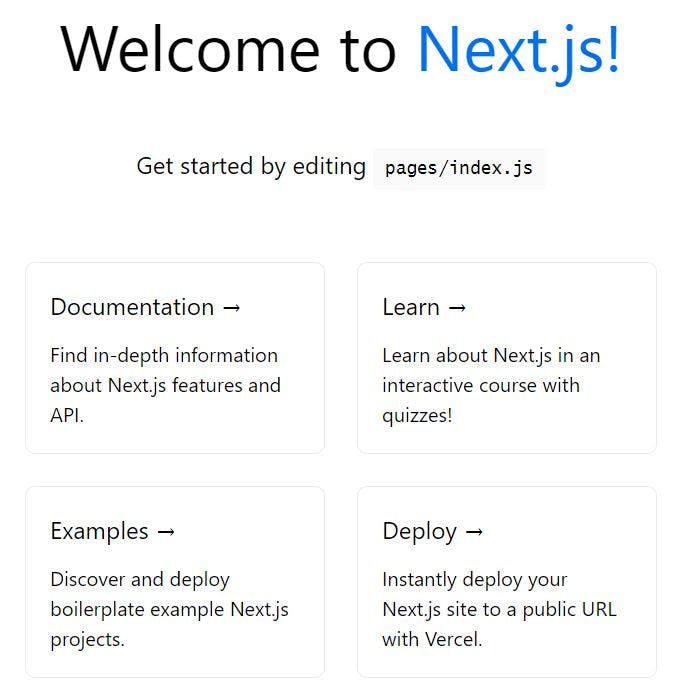
Now we know it's all working as intended.
Let's dive into RainbowKit and WAGMI
RainbowKit
We are going to install RainbowKit, Wagmi and Ethers in one shot as both are dependent on one another.
yarn add @rainbow-me/rainbowkit wagmi ethers
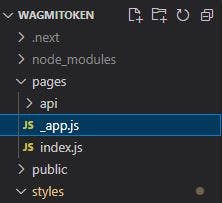
Once installed, we are going to go to the _app.js file that is within our PAGES folder at the root of our Next.js project
The code should look pretty bare:
import '../styles/globals.css'

function MyApp({ Component, pageProps }) {
  return <Component {...pageProps} />
}

export default MyApp
Now it is time to start importing the RainbowKit Wallet. (They have pretty decent docs - rainbowkit.com/docs/installation) Let's break it down. This is how my _app.js looks so far:
import '../styles/globals.css'
import '@rainbow-me/rainbowkit/styles.css';
import {
  getDefaultWallets,
  RainbowKitProvider,
} from '@rainbow-me/rainbowkit';
import {
  chain,
  configureChains,
  createClient,
  WagmiConfig,
} from 'wagmi';
import { alchemyProvider } from 'wagmi/providers/alchemy';
import { publicProvider } from 'wagmi/providers/public';


function MyApp({ Component, pageProps }) {
  return <Component {...pageProps} />
}

export default MyApp
So what does it all mean?
We are importing the styles for rainbow kit, already built in for us to use
import '@rainbow-me/rainbowkit/styles.css';
This imports the Default wallets (Metamask, WalletConnect, Coinbase and Rainbow Wallet) and Brings in the Provider Wrapper for our _app.js object
import {
  getDefaultWallets,
  RainbowKitProvider,
} from '@rainbow-me/rainbowkit';
This part is for the Wagmi configuration
- chain - brings in default chains included in Wagmi (ethereum, test nets, polygon, etc), configureChains - lets us modify the providers for our chains (we could use infura, alchemy, Ankr, Pokt, or any of our choosing)
- createClient - Lets us manage our Wallets (Metamask, etc) and Providers(alchemy, ankr, etc)
- WagmiConfig - This is the wrapper for our entire _app.js object (since rainbow kit is dependent on Wagmi, it wraps over rainbow kit wrapper)
import {
  chain,
  configureChains,
  createClient,
  WagmiConfig,
} from 'wagmi';
The providers, this part was especially confusing for me between the wagmi docs and the rainbow docs. In short, one really cool feature of Wagmi is to have failover RPCs. Let's say we start with an infura RPC and that fails, then we can use an Alchemy RPC and that fails and finally we can use the Public RPCs so that people can keep using our dapp even if our account API fails. Really useful for Wallet Connect and Coinbase Wallet. So we are literally, just importing providers here:
import { alchemyProvider } from 'wagmi/providers/alchemy';
import { publicProvider } from 'wagmi/providers/public';
Now Let's configure out imports, if you have been following the docs your code should look like this so far:
import '../styles/globals.css'
import '@rainbow-me/rainbowkit/styles.css';
import {
  getDefaultWallets,
  RainbowKitProvider,
} from '@rainbow-me/rainbowkit';
import {
  chain,
  configureChains,
  createClient,
  WagmiConfig,
} from 'wagmi';
import { alchemyProvider } from 'wagmi/providers/alchemy';
import { publicProvider } from 'wagmi/providers/public';

// Newly imported code here

const { chains, provider } = configureChains(
  [chain.mainnet, chain.polygon, chain.optimism, chain.arbitrum],
  [
    alchemyProvider({ alchemyId: process.env.ALCHEMY_ID }),
    publicProvider()
  ]
);

const { connectors } = getDefaultWallets({
  appName: 'My RainbowKit App',
  chains
});

const wagmiClient = createClient({
  autoConnect: true,
  connectors,
  provider
})

// new imported code stops here

function MyApp({ Component, pageProps }) {
  return <Component {...pageProps} />
}

export default MyApp
So let's break down what is happening here in the configuration
Setting up configureChains hook. Here we are using this awesome tool to let our variables "chains" and "provider" know what chains we are using and what providers we are using.
"chains" is taking in mainnet, polygon, optimism and arbitrum. (Wagmi has a built in list of chains, if you want to add more you can type chain. and see the list of available prebuilt chains to choose from. You can even add your own chain)
"provider" is taking in both Alchemy provider (with our API key) and public provider. We can also add more providers as well. So it will first go with Alchemy first and if it fails, then the public provider.
const { chains, provider } = configureChains(
  [chain.mainnet, chain.polygon, chain.optimism, chain.arbitrum,],
  [
    alchemyProvider({ alchemyId: process.env.ALCHEMY_ID }),
    publicProvider()
  ]
);
Setting our Default wallets. This sets up our variable "connectors" to accepts the chains that we just previously set in the "configureChains" and giving the app our name (we can change that to whatever we want, our Dapp Name)
const { connectors } = getDefaultWallets({
  appName: 'My RainbowKit App',
  chains
});
The createClient just puts it all together in a single Object call wagmiClient. We take "connectors" we just previously setup (this took in our chains we want to support) and our "Providers" (the RPCs we have setup) and bundle it up for wagmi to refer to. AutoConnect refers to connecting to the wallet on the refresh of the webpage. Not sure of any reason we would want it off or "false."
const wagmiClient = createClient({
  autoConnect: true,
  connectors,
  provider
})
Now that we have all the basic configurations setup, we can now wrap our _app.js object so wagmi and rainbowkit will function throughout our entire website. We are going to turn this part:
function MyApp({ Component, pageProps }) {
  return <Component {...pageProps} />
}
to this:
function MyApp({ Component, pageProps }) {
  return (
    <WagmiConfig client={wagmiClient}>
      <RainbowKitProvider chains={chains}>
        <Component {...pageProps} />
      </RainbowKitProvider>
    </WagmiConfig>
  );
}
We just wrapped out website "object" with the RainbowKit wrapper and let it know we want to support these "chains" (the chains we chose in "configureChains"). Then we wrapped this entire wrapping with the WagmiConfig wrapper and set it to the wagmiClient (that set the type of wallets we will support and the RPC providers). That's alot of wrapping but at the end, your _app.js file should look like this:
import "../styles/globals.css";
import "@rainbow-me/rainbowkit/styles.css";
import { getDefaultWallets, RainbowKitProvider } from "@rainbow-me/rainbowkit";
import { chain, configureChains, createClient, WagmiConfig } from "wagmi";
import { alchemyProvider } from "wagmi/providers/alchemy";
import { publicProvider } from "wagmi/providers/public";

const { chains, provider } = configureChains(
  [chain.mainnet, chain.polygon, chain.optimism, chain.arbitrum],
  [alchemyProvider({ alchemyId: process.env.ALCHEMY_ID }), publicProvider()]
);

const { connectors } = getDefaultWallets({
  appName: "My RainbowKit App",
  chains,
});

const wagmiClient = createClient({
  autoConnect: true,
  connectors,
  provider,
});

function MyApp({ Component, pageProps }) {
  return (
    <WagmiConfig client={wagmiClient}>
      <RainbowKitProvider chains={chains}>
        <Component {...pageProps} />
      </RainbowKitProvider>
    </WagmiConfig>
  );
}

export default MyApp;
With this setup, you are now ready to connect your wallet with RainbowKit. We can do that really quick.
Let's go back to our "Pages" folder and go to index.js
I went ahead and deleted all the starter data and imported the rainbowKit wallet at the top:
import { ConnectButton } from '@rainbow-me/rainbowkit';
Using Tailwind, I just added some CSS to center it. The code in index.js looks like this:
import { ConnectButton } from '@rainbow-me/rainbowkit';

export default function Home() {
  return (
    <div className="flex justify-center mt-20" >
      <ConnectButton />
    </div>
  )
}
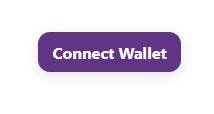
I hit connect wallet, rainbow kit pops up, I choose my wallet and it connects!
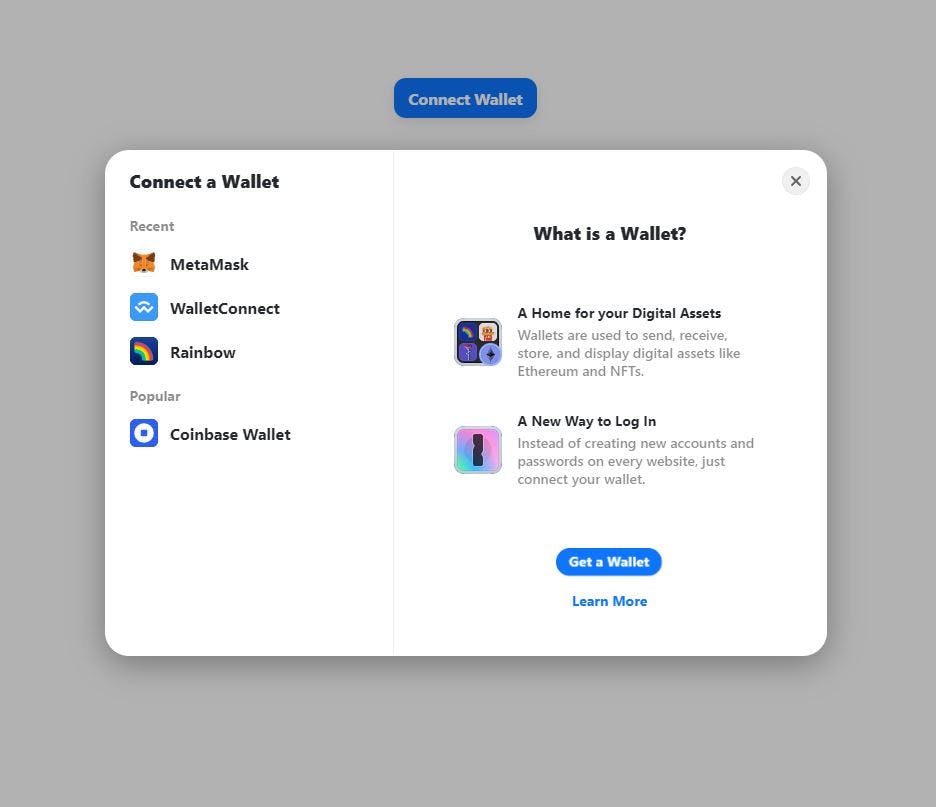
Connected!

Alright it works, tutorial over. Yeah right! This is where most tutorials end, I'm like we haven't even gotten started! How do I add more chains that aren't supported by default, how do I change the color of the button? How do I connect this to my contract!
This is and still is my biggest frustration with many tutorials. I don't know how many tutorials I've spent reading that all stop at the same place. So let's get to it. Let's go back to _app.js and dig a little bit deeper.
Let's start easy.
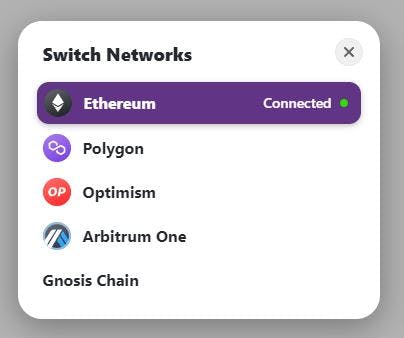
Change the color of the Rainbow Kit "connect RainbowKit has themes that change the overall look of the pop up. This was the only way I could find a way to change the color of the button. rainbowkit.com/docs/theming Currently, there are three themes: darkTheme, lightTheme, midnightTheme. We will import them with our Default Wallets and RainbowKitProvider imports as so:
import { getDefaultWallets, RainbowKitProvider, darkTheme, lightTheme, midnightTheme } from "@rainbow-me/rainbowkit";
Then down at the bottom where are wrappers are, we are going to choose the theme and make our changes. We can change the color with hex values:
<WagmiConfig client={wagmiClient}>
      <RainbowKitProvider coolMode chains={chains} theme={lightTheme({
      accentColor: '#623485',  //color of wallet  try #703844
      accentColorForeground: 'white', //color of text
      borderRadius: 'large', //rounded edges
      fontStack: 'system',
    })}>
        <Component {...pageProps} />
      </RainbowKitProvider>
    </WagmiConfig>
Play with the themes and hex values, but this code will output:
Let's add our own custom providers or more providers!
Remember when we imported and configured the providers and chains?
import { alchemyProvider } from "wagmi/providers/alchemy";
import { publicProvider } from "wagmi/providers/public";

const { chains, provider } = configureChains(
  [chain.mainnet, chain.polygon, chain.optimism, chain.arbitrum],
  [alchemyProvider({ alchemyId: process.env.ALCHEMY_ID }), publicProvider()]
);
Let's add some more to that, we will import our own jsonRpcProvider like this:
import { alchemyProvider } from "wagmi/providers/alchemy";
import { publicProvider } from "wagmi/providers/public";
import { jsonRpcProvider } from 'wagmi/providers/jsonRpc'; //<<< new RPC
Now that we imported it, we can add it to our "configureChains" hook and set it up. You will see the "jsonRpcProvider" is in the middle of alchemy and public. It is manually setup to use the Gnosis Chain RPC (going to get to that in a bit), but want to show that you can use ANY RPC of your liking for this. You are not limited to the preset RPCs that wagmi supports. So now the order of failure would be , alchemy, ankr and then public RPCs:
const { chains, provider } = configureChains(
  [chain.mainnet, chain.polygon, chain.optimism, chain.arbitrum],
  [
    alchemyProvider({ alchemyId: process.env.ALCHEMY_ID }),
    jsonRpcProvider({ rpc: () => ({ http: "https://rpc.ankr.com/gnosis" }) }),  //<<<< New RPC Provider
    publicProvider(),
  ]
);
Final code should look like this:
import "../styles/globals.css";
import "@rainbow-me/rainbowkit/styles.css";
import {
  getDefaultWallets,
  RainbowKitProvider,
  darkTheme,
  lightTheme,
  midnightTheme,
} from "@rainbow-me/rainbowkit";
import { chain, configureChains, createClient, WagmiConfig } from "wagmi";
import { alchemyProvider } from "wagmi/providers/alchemy";
import { publicProvider } from "wagmi/providers/public";
import { jsonRpcProvider } from "wagmi/providers/jsonRpc";

const { chains, provider } = configureChains(
  [chain.mainnet, chain.polygon, chain.optimism, chain.arbitrum],
  [
    alchemyProvider({ alchemyId: process.env.ALCHEMY_ID }),
    jsonRpcProvider({ rpc: () => ({ http: "https://rpc.ankr.com/gnosis" }) }),  //<<<< New RPC Provider
    publicProvider(),
  ]
);

const { connectors } = getDefaultWallets({
  appName: "My RainbowKit App",
  chains,
});

const wagmiClient = createClient({
  autoConnect: true,
  connectors,
  provider,
});

function MyApp({ Component, pageProps }) {
  return (
    <WagmiConfig client={wagmiClient}>
      <RainbowKitProvider
        chains={chains}
        theme={lightTheme({
          accentColor: "#623485", //color of wallet  try #703844
          accentColorForeground: "white",
          borderRadius: "large",
          fontStack: "system",
        })}
      >
        <Component {...pageProps} />
      </RainbowKitProvider>
    </WagmiConfig>
  );
}

export default MyApp;
Ok, so for this mumbai testnet we don't really need to have so many RPCs but I wanted to show you how you could modify things to make the front end work for you. Gnosis chain does not need an infura or alchemy API, so that confused me as to how to use it... and now you know! You just need the ankr RPC and POW! it works.... but wait.. WAGMI doesn't support Gnosis chain by default... say no more.
Adding a custom chain to Wagmi
We are going to put it right in the _app.js for simplicity. Just underneath the imports I'm going to right in this code:
/* adding gnosis network */
const GnosisChain = {
  id: 100,
  name: 'Gnosis Chain',
  network: 'Gnosis',
  nativeCurrency: {
    decimals: 18,
    name: 'xDai',
    symbol: 'xDai',
  },
  rpcUrls: {
    default: 'https://rpc.ankr.com/gnosis',
  },
  blockExplorers: {
    default: { name: 'Blockscout', url: 'https://blockscout.com/xdai/mainnet' },
  },
  iconUrls: ["https://images.prismic.io/koinly-marketing/16d1deb7-e71f-48a5-9ee7-83eb0f7038e4_Gnosis+Chain+Logo.png"],
  testnet: false,
}
Now we have a variable "GnosisChain" that I can add in in the list of networks I want to support.
const { chains, provider } = configureChains(
  [chain.mainnet, chain.polygon, chain.optimism, chain.arbitrum, GnosisChain], //  <<<<<< Gnosis Chain Addedd
  [
    alchemyProvider({ alchemyId: process.env.ALCHEMY_ID }),
    jsonRpcProvider({ rpc: () => ({ http: "https://rpc.ankr.com/gnosis" }) }),  //<<<< New RPC Provider
    publicProvider(),
  ]
);
Boom! Now Gnosis chain is supported. Unfortunately, it doesn't support icons for some networks but hey it works! Now you can add new networks like Avalaunch or Moonriver etc.
Final Code should look this:
import "../styles/globals.css";
import "@rainbow-me/rainbowkit/styles.css";
import {
  getDefaultWallets,
  RainbowKitProvider,
  darkTheme,
  lightTheme,
  midnightTheme,
} from "@rainbow-me/rainbowkit";
import { chain, configureChains, createClient, WagmiConfig } from "wagmi";
import { alchemyProvider } from "wagmi/providers/alchemy";
import { publicProvider } from "wagmi/providers/public";
import { jsonRpcProvider } from "wagmi/providers/jsonRpc";

/* adding gnosis network */
const GnosisChain = {
  id: 100,
  name: 'Gnosis Chain',
  network: 'Gnosis',
  nativeCurrency: {
    decimals: 18,
    name: 'xDai',
    symbol: 'xDai',
  },
  rpcUrls: {
    default: 'https://rpc.ankr.com/gnosis',
  },
  blockExplorers: {
    default: { name: 'Blockscout', url: 'https://blockscout.com/xdai/mainnet' },
  },
  iconUrls: ["https://images.prismic.io/koinly-marketing/16d1deb7-e71f-48a5-9ee7-83eb0f7038e4_Gnosis+Chain+Logo.png"],
  testnet: false,
}


const { chains, provider } = configureChains(
  [chain.mainnet, chain.polygon, chain.optimism, chain.arbitrum, GnosisChain], //  <<<<<< Gnosis Chain Addedd
  [
    alchemyProvider({ alchemyId: process.env.ALCHEMY_ID }),
    jsonRpcProvider({ rpc: () => ({ http: "https://rpc.ankr.com/gnosis" }) }),  //<<<< New RPC Provider
    publicProvider(),
  ]
);

const { connectors } = getDefaultWallets({
  appName: "My RainbowKit App",
  chains,
});

const wagmiClient = createClient({
  autoConnect: true,
  connectors,
  provider,
});

function MyApp({ Component, pageProps }) {
  return (
    <WagmiConfig client={wagmiClient}>
      <RainbowKitProvider
        coolMode
        chains={chains}
        theme={lightTheme({
          accentColor: "#623485", //color of wallet  try #703844
          accentColorForeground: "white",
          borderRadius: "large",
          fontStack: "system",
        })}
      >
        <Component {...pageProps} />
      </RainbowKitProvider>
    </WagmiConfig>
  );
}

export default MyApp;
Cool Mode
A fun little bonus that rainbow kit has is "cool mode" When you connect your wallet, a little animation happens to add some flair. You can enable it in your wallet by adding "cool mode" here:
<WagmiConfig client={wagmiClient}>
      <RainbowKitProvider
        coolMode  //<<<<<<<< coolMode
        chains={chains}
        theme={lightTheme({
          accentColor: "#623485",
          accentColorForeground: "white",
          borderRadius: "large",
          fontStack: "system",
        })}
      >
        <Component {...pageProps} />
      </RainbowKitProvider>
    </WagmiConfig>
Turning off balances on your connected wallet
I like a nice minimal design on my sites. Connect Wallet looks so nice but when I actually connect it, it turns into this big ol' thing with network options and balances. I don't want all that. It pushes my navigation bar over too much, just doesn't look right sometimes.
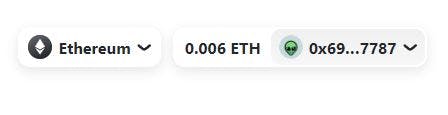
Here is how we fix it: On the index.js page, we go to the connect wallet and add it this part to the ConnectButton object.
<ConnectButton showBalance={false} />
Boom! Balance gone:
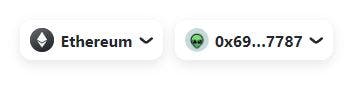
As for the networks, we have to limit our network options to only ONE network and it will go away. So going back to the _app.js in the "configureChains" hook, we take out all the chains we don't need. (We are only going to use mumbai, so I'm going to clean it up taking out all the other chains and the jsonRpc Provider)
const { chains, provider } = configureChains(
  [chain.polygonMumbai],
  [
    alchemyProvider({ alchemyId: process.env.ALCHEMY_ID }),
    publicProvider(),
  ]
);
And there it is, this will just show an address or ENS
WAGMI
Now that we can the wallet connections set, let's focus on getting out website connected to our deployed contract on chain.
Our website is going to sit on a single page so all our work will be in index.js. Let's go ahead and import some hooks from wagmi:
- useAccount - Returns the connected address. Can also give updates on the type of connection type used. (Won't dig to deep, in short it can be used to display the connected address in other parts of your site or used as an argument for a function).
- useConnect - Can give status if a wallet is connected to the dapp (can have conditional displays). This can also return info on the connector type and the provider being used.
- useContract - An ethers based way of both writing and reading from the contract
- useContractRead - Used to read a function of the connected contract and return it to a variable such as totalSupply or totalMinted.
- useContractWrite - This is how you send calls to the contract, returns many statuses that we will dig into.
- useNetwork - Returns the value of which chain id you are currently on. Also allows you to easily switch network.
- useWaitForTransaction - This will watch your specified function and keep track of the transaction. Will give a loading, success, failure notice.
import {
  useAccount,
  useConnect,
  useContract,
  useContractRead,
  useContractWrite,
  useNetwork,
  useWaitForTransaction,
} from "wagmi";
We will also be importing ethers.js because wagmi builds off of ethers
import { ethers } from "ethers";
We will also use some react hooks for state management:
import { useState, useEffect } from "react";
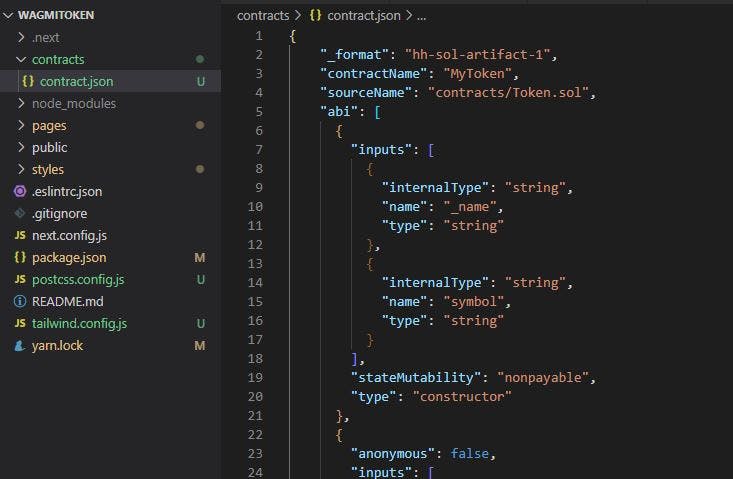
Finally, we need two more things. The contract abi and the contract address. Remember we had two options for the abi? Pull it from our artifacts or from the verified contract on chain. I'm going to go ahead and pull the whole file from my artifacts and make a folder on my front end app call "contracts" and make a file called "contract.json" (you will notice I pulled all the data from the artifacts including the bytecode, I'll explain how to pull the abi in a bit)
Then I will import it as "tokenContract" on my index.js page
import { ConnectButton } from '@rainbow-me/rainbowkit';
import {
  useAccount,
  useConnect,
  useContract,
  useContractRead,
  useContractWrite,
  useNetwork,
  useWaitForTransaction,
} from "wagmi";
import { ethers } from "ethers";
import { useState, useEffect } from "react";
import tokenContract from "../contracts/contract.json";

export default function Home() {


  return (
    <div className="flex justify-center mt-20" >
      <ConnectButton showBalance={false}  />
    </div>
  )
}
Usually, for security I put the contract address in a .env file to protect hackers from changing the contract address on the website and have you connect to a nefarious contract but for simplicity I'm just going to make it a constant.
const CONTRACT_ADDRESS = "0xAfCF939f2870fc82920058b147A8ff4db98803a5";
SIDE NOTE In previous versions of Wagmi, used to be able to create a constant combining the same variables into a single one to make the code cleaner but as of the latest update, it doesn't work. I'm sure it will be patched, but I don't want somebody getting frustrated because it doesn't work.
What I used to do: make contractConfig a variable I can pass to all functions when I wrote or read from the contract. You can try it, but I can't guarantee it will work on the latest build.
const contractConfig = {
    addressOrName: CONTRACT_ADDRESS,
    contractInterface: tokenContract.abi,
  };
This is what my code looks like so far after all the imports and declaration of my Contract Address:
import { ConnectButton } from '@rainbow-me/rainbowkit';
import {
  useAccount,
  useConnect,
  useContract,
  useContractRead,
  useContractWrite,
  useNetwork,
  useWaitForTransaction,
} from "wagmi";
import { ethers } from "ethers";
import { useState, useEffect } from "react";
import tokenContract from "../contracts/contract.json";

export default function Home() {

  const CONTRACT_ADDRESS = "0xAfCF939f2870fc82920058b147A8ff4db98803a5";

  /* Not working on this build
  const contractConfig = {
    addressOrName: CONTRACT_ADDRESS,
    contractInterface: tokenContract.abi,
  };
  */


  return (
    <div className="flex justify-center mt-20" >
      <ConnectButton showBalance={false}  />
    </div>
  )
}
WRITING TO A CONTRACT with WAGMI
We are going to call the "mint" function from out deployed contract. It takes in two variables an Address and an uint Amount:
function mint(address to, uint256 amount)
We are going to be using useContractWrite. This hook has a lot of data do it, it gives us a function to write to it, recieve and error, let us know if it is loading and if it succeeded and returns the data back to us.
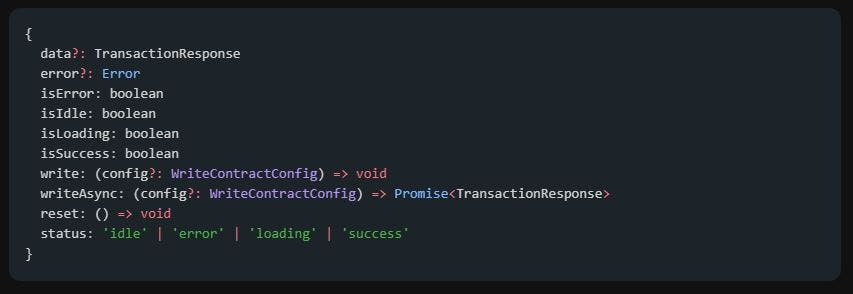
Let's set it up for out function:
ALL Wagmi hooks have THE SAME VARIABLES!!! They ALL HAVE "data", "error", "isLoading" etc. If you only use one function it works, if you try to use another function it will error out. So you have to set ALIAS to your variables. "data: mintData", "error: mintError", "isLoading: isMintLoading" etc. This way you can also distinguish which variable belongs to which function. I lost too much time stuck on this.
- {data: mintData, - This is our data that gets returned with out function
- write: buy, - This is our function name that we can call and pass arguments
- isLoading: isMintLoading, - This will be true, when I click the function and it is prompting my wallet to sign
- isSuccess: isMintStarted, - This will be true when I successfully mint
- error: mintError, - This will return error data
- } = useContractWrite({ - This is just calling useContractWrite
- addressOrName: CONTRACT_ADDRESS, - This is the standard input for calling wagmi functions
- contractInterface: tokenContract.abi, - My contract abi
- functionName: "mint", - The EXACT name of the function I'm calling (case sensitive)
- });
 //Mint Function
  const {
    data: mintData,
    write: buy,
    isLoading: isMintLoading,
    isSuccess: isMintStarted,
    error: mintError,
  } = useContractWrite({
    addressOrName: CONTRACT_ADDRESS,
    contractInterface: tokenContract.abi,
    functionName: "mint",
  });
We are going to write a small function to pass the arguments to the mint function. For simplicity, I hardcoded and address and an amount for this part. I'm also going to write a console log so I can see the data that passes through the useWriteContract.
const mintFreeTokens = async () => {
    await buy({args: ["0x58bb47a89A329305cbD63960C3F544cfA4584db9", ethers.utils.parseEther("2")]})
  }

  useEffect(() => {
    console.log("mintData:", mintData);
    console.log("isMintLoading:", isMintLoading);
    console.log("isMintStarted", isMintStarted);
    console.log("mintError:", mintError);
    console.log("___________");
  }, [mintData, isMintLoading, isMintStarted]);
I also did a little CSS to format the page a little better so here is the code at this point. I have one useContractWrite Hook for my mint function, I have small function "mintFreeTokens" to call and pass arguments to the "buy" function with hardcoded arguments and a console log to view the data. Here is the full code (note the onClick on the button calls the "mintFreeTokens" function:
import { ConnectButton } from "@rainbow-me/rainbowkit";
import {
  useAccount,
  useConnect,
  useContract,
  useContractRead,
  useContractWrite,
  useNetwork,
  useWaitForTransaction,
} from "wagmi";
import { ethers } from "ethers";
import { useState, useEffect } from "react";
import tokenContract from "../contracts/contract.json";

export default function Home() {
  const CONTRACT_ADDRESS = "0xAfCF939f2870fc82920058b147A8ff4db98803a5";

  /* Not working on this build
  const contractConfig = {
    addressOrName: CONTRACT_ADDRESS,
    contractInterface: tokenContract.abi,
  };
  */

  //Mint Function
  const {
    data: mintData,
    write: buy,
    isLoading: isMintLoading,
    isSuccess: isMintStarted,
    error: mintError,
  } = useContractWrite({
    addressOrName: CONTRACT_ADDRESS,
    contractInterface: tokenContract.abi,
    functionName: "mint",
  });

  const mintFreeTokens = async () => {
    await buy({args: ["0x58bb47a89A329305cbD63960C3F544cfA4584db9", ethers.utils.parseEther("2")]})
  }

  useEffect(() => {
    console.log("mintData:", mintData);
    console.log("isMintLoading:", isMintLoading);
    console.log("isMintStarted", isMintStarted);
    console.log("mintError:", mintError);
    console.log("___________");
  }, [mintData, isMintLoading, isMintStarted]);

  return (
    <div className="container flex flex-col  items-center mt-10">
      <div className="flex mb-6">
        <ConnectButton showBalance={false} />
      </div>
      <h3 className="text-5xl font-bold mb-20">
        {"Billyjitsu's token drop"}
      </h3>

      <div className="flex flex-col">
        <button
          onClick={mintFreeTokens}
          className="bg-gray-900 text-white hover:bg-gray-800 rounded-full px-12 py-2 sm:w-auto"
          disabled={isMintLoading}
        >
          Mint Tokens
        </button>
      </div>
    </div>
  );
}
This is what the webpage looks like and the console data when minting.
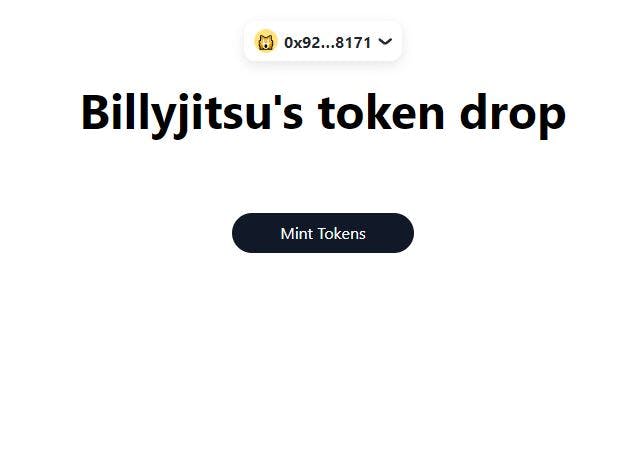
You can see that the mintData returns a lot of information upon success
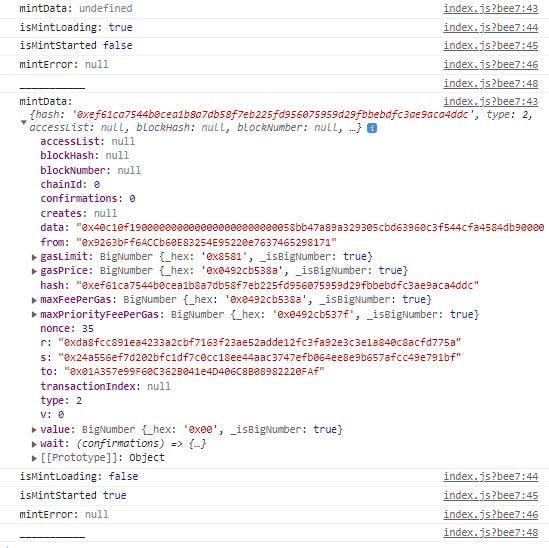
This data can be used for multiple interactions on the front end depending on the returned data which leads us to the next hook "useWaitforTransaction"
Following a similar patten, useWaitForTransaction has it's own set of return values. One thing to note is we have to define hash or wait which I did below:
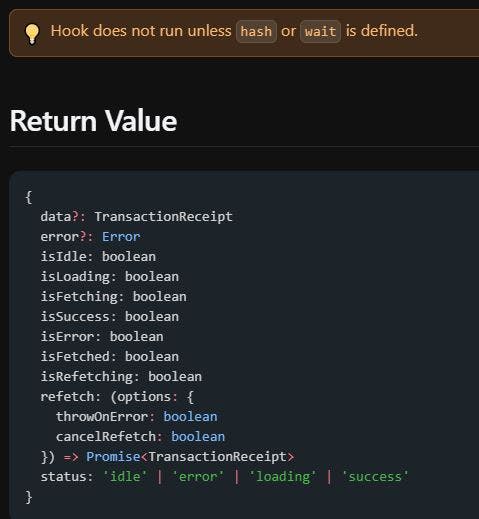
- { isSuccess: txSuccess, - Setting an alias for "isSuccess" to txSuccess, if success TRUE
- error: txError } - If an error TRUE
- = useWaitForTransaction({
- confirmations: 1, - I set it to wait for 1 confirmation on the transaction
- hash: mintData?.hash, - define the hash setting this has to my mintData hash });
const { isSuccess: txSuccess, error: txError } = useWaitForTransaction({
    confirmations: 1,
    hash: mintData?.hash,
  });
I added a little code snippet on the bottom of the CSS with the boolean stating if the transaction was a success show the text "success." You can play with the returns of the transaction where it succeeded or failed to notify your users. The code so far:
import { ConnectButton } from "@rainbow-me/rainbowkit";
import {
  useAccount,
  useConnect,
  useContract,
  useContractRead,
  useContractWrite,
  useNetwork,
  useWaitForTransaction,
} from "wagmi";
import { ethers } from "ethers";
import { useState, useEffect } from "react";
import tokenContract from "../contracts/contract.json";

export default function Home() {
  const CONTRACT_ADDRESS = "0xAfCF939f2870fc82920058b147A8ff4db98803a5";

  /* Not working on this build
  const contractConfig = {
    addressOrName: CONTRACT_ADDRESS,
    contractInterface: tokenContract.abi,
  };
  */

  //Mint Function
  const {
    data: mintData,
    write: mintToken,
    isLoading: isMintLoading,
    isSuccess: isMintStarted,
    error: mintError,
  } = useContractWrite({
    addressOrName: CONTRACT_ADDRESS,
    contractInterface: tokenContract.abi,
    functionName: "mint",
  });

  const mintFreeTokens = async () => {
    await mintToken({args: ["0x58bb47a89A329305cbD63960C3F544cfA4584db9", ethers.utils.parseEther("2")]})
  }

   // Check TX for mint function
   const { isSuccess: txSuccess, error: txError } = useWaitForTransaction({
    confirmations: 1,
    hash: mintData?.hash,
  });

  /*
  useEffect(() => {
    console.log("mintData:", mintData);
    console.log("isMintLoading:", isMintLoading);
    console.log("isMintStarted", isMintStarted);
    console.log("mintError:", mintError);
    console.log("___________");
  }, [mintData, isMintLoading, isMintStarted]);
  */

  return (
    <div className="container flex flex-col  items-center mt-10">
      <div className="flex mb-6">
        <ConnectButton showBalance={false} />
      </div>
      <h3 className="text-5xl font-bold mb-20">
        {"Billyjitsu's token drop"}
      </h3>

      <div className="flex flex-col">
        <button
          onClick={mintFreeTokens}
          className="bg-gray-900 text-white hover:bg-gray-800 rounded-full px-12 py-2 sm:w-auto"
          disabled={isMintLoading}
        >
          Mint Tokens
        </button>
        {txSuccess && <p>Success</p>}
      </div>
    </div>
  );
}
Now let's read totalSupply from the contract. Since it is an Open Zepellin ERC20, it follows all the readable standard, so let's get the data from the contract.
useContractRead is almost exactly like Write but there is not function to call it just reads and returns the data.
I made an alias for the "data" called "totalSupplyData," the function name is "totalSupply" and one option on the ReadContract is the "watch" option that will continuously reads the data from contract (that can use API calls if refreshing webpage).
const { data: totalSupplyData } = useContractRead({
    addressOrName: CONTRACT_ADDRESS,
    contractInterface: tokenContract.abi,
    functionName: "totalSupply",
    watch: true,
  });
Were are going to use useState to keep the site updated when we mint:
const [supplyData, setSupplyData] = useState(0);
Also, anytime the "totalSupplyData" changes, I want to update the state. I will put a useEffect to run everytime there is a change (because the return is in 18 decimals, I'm dividing by 10**18
useEffect(() => {
    if (totalSupplyData) {
      let temp = totalSupplyData / (10**18);
      setSupplyData(temp);
    }
  }, [totalSupplyData]);
Updated the webpage for the user to view:
<h3 className="text-lg ">Total minted</h3>
<h3 className="text-lg">{supplyData}</h3>
This is the code in total:
import { ConnectButton } from "@rainbow-me/rainbowkit";
import {
  useAccount,
  useConnect,
  useContract,
  useContractRead,
  useContractWrite,
  useNetwork,
  useWaitForTransaction,
} from "wagmi";
import { ethers } from "ethers";
import { useState, useEffect } from "react";
import tokenContract from "../contracts/contract.json";

export default function Home() {
  const CONTRACT_ADDRESS = "0xAfCF939f2870fc82920058b147A8ff4db98803a5";
  const [supplyData, setSupplyData] = useState(0);

  /* Not working on this build
  const contractConfig = {
    addressOrName: CONTRACT_ADDRESS,
    contractInterface: tokenContract.abi,
  };
  */

  //Mint Function
  const {
    data: mintData,
    write: mintToken,
    isLoading: isMintLoading,
    isSuccess: isMintStarted,
    error: mintError,
  } = useContractWrite({
    addressOrName: CONTRACT_ADDRESS,
    contractInterface: tokenContract.abi,
    functionName: "mint",
  });

  const mintFreeTokens = async () => {
    await mintToken({
      args: [
        "0x58bb47a89A329305cbD63960C3F544cfA4584db9",
        ethers.utils.parseEther("2"),
      ],
    });
  };

  // Check TX for mint function
  const { isSuccess: txSuccess, error: txError } = useWaitForTransaction({
    confirmations: 1,
    hash: mintData?.hash,
  });

  // Total Tokens
  const { data: totalSupplyData } = useContractRead({
    addressOrName: CONTRACT_ADDRESS,
    contractInterface: tokenContract.abi,
    functionName: "totalSupply",
    watch: true,
  });

  useEffect(() => {
    if (totalSupplyData) {
      let temp = totalSupplyData / 10 ** 18;
      setSupplyData(temp);
    }
  }, [totalSupplyData]);

  /*
  useEffect(() => {
    console.log("mintData:", mintData);
    console.log("isMintLoading:", isMintLoading);
    console.log("isMintStarted", isMintStarted);
    console.log("mintError:", mintError);
    console.log("___________");
  }, [mintData, isMintLoading, isMintStarted]);
  */

  return (
    <div className="container flex flex-col  items-center mt-10">
      <div className="flex mb-6">
        <ConnectButton showBalance={false} />
      </div>
      <h3 className="text-5xl font-bold mb-20">{"Billyjitsu's token drop"}</h3>

      <div className="flex flex-col">
        <button
          onClick={mintFreeTokens}
          className="bg-gray-900 text-white hover:bg-gray-800 rounded-full px-12 py-2 sm:w-auto"
          disabled={isMintLoading}
        >
          Mint Tokens
        </button>
        {txSuccess && <p>Success</p>}
      </div>
      <div className="text-center">
        <h3 className="text-lg ">Total minted</h3>

        <h3 className="text-lg">{supplyData}</h3>
      </div>
    </div>
  );
}
There is one more way to Read or Write to a contract, while is is not recommended by Wagmi I still use it when I need something to run more like ethers.js
This will require us to import useSigner into our wagmi imports
import {
  useAccount,
  useConnect,
  useContract,
  useContractRead,
  useContractWrite,
  useNetwork,
  useSigner,  //<<<<<<<
  useWaitForTransaction,
} from "wagmi";
useContract requires a signer or provider, we supply it with our wallet signer and set the useContract to a variable. Notice we do no declare a function name.
declare Signer (the "d" in data is case sensitive):
const { data: signerData } = useSigner();
const buyTokens = useContract({
    addressOrName: CONTRACT_ADDRESS,
    contractInterface: tokenContract.abi,
    signerOrProvider: signerData,
  });
We are going to call the "buyTokens" call in a more ethers.js approach
We will create a function and then use the "buyTokens" object to call the contract function "buy" and pass the amount and Value required to purchase
const buySomeTokens = async () => {
     await buyTokens.buy("1", {value: ethers.utils.parseEther(".01")})
  }
I added another button on the button on the page to run the "buySomeTokens" function with a little spacing. We don't have the boolean returns like "useContractWrite"
isLoading:
isSuccess:
We would need to make our own logic useState booleans to show status of success if we choose to do so (I did not).
import { ConnectButton } from "@rainbow-me/rainbowkit";
import {
  useAccount,
  useConnect,
  useContract,
  useContractRead,
  useContractWrite,
  useNetwork,
  useSigner,   //<<<<<<<
  useWaitForTransaction,
} from "wagmi";
import { ethers } from "ethers";
import { useState, useEffect } from "react";
import tokenContract from "../contracts/contract.json";

export default function Home() {
  const CONTRACT_ADDRESS = "0xAfCF939f2870fc82920058b147A8ff4db98803a5";
  const [supplyData, setSupplyData] = useState(0);


  const { data: signerData } = useSigner();


  /* Not working on this build
  const contractConfig = {
    addressOrName: CONTRACT_ADDRESS,
    contractInterface: tokenContract.abi,
  };
  */

  //Mint Function
  const {
    data: mintData,
    write: mintToken,
    isLoading: isMintLoading,
    isSuccess: isMintStarted,
    error: mintError,
  } = useContractWrite({
    addressOrName: CONTRACT_ADDRESS,
    contractInterface: tokenContract.abi,
    functionName: "mint",
  });

  const mintFreeTokens = async () => {
    await mintToken({
      args: [
        "0x58bb47a89A329305cbD63960C3F544cfA4584db9",
        ethers.utils.parseEther("2"),
      ],
    });
  };

  // Check TX for mint function
  const { isSuccess: txSuccess, error: txError } = useWaitForTransaction({
    confirmations: 1,
    hash: mintData?.hash,
  });

  // Total tokens
  const { data: totalSupplyData } = useContractRead({
    addressOrName: CONTRACT_ADDRESS,
    contractInterface: tokenContract.abi,
    functionName: "totalSupply",
    watch: true,
  });

  //Using useContract only (instead of useContractWrite)
  const buyTokens = useContract({
    addressOrName: CONTRACT_ADDRESS,
    contractInterface: tokenContract.abi,
    signerOrProvider: signerData,
  });

  const buySomeTokens = async () => {
     await buyTokens.buy("1", {value: ethers.utils.parseEther(".01")});
  }

  useEffect(() => {
    if (totalSupplyData) {
      let temp = totalSupplyData / 10 ** 18;
      setSupplyData(temp);
    }
  }, [totalSupplyData]);

  /*
  useEffect(() => {
    console.log("mintData:", mintData);
    console.log("isMintLoading:", isMintLoading);
    console.log("isMintStarted", isMintStarted);
    console.log("mintError:", mintError);
    console.log("___________");
  }, [mintData, isMintLoading, isMintStarted]);
  */

  return (
    <div className="container flex flex-col justify-center mx-auto items-center mt-10">
      <div className="flex mb-6">
        <ConnectButton showBalance={false} />
      </div>
      <h3 className="text-5xl font-bold mb-20">{"Billyjitsu's token drop"}</h3>

      <div className="flex flex-col mb-8">
        <button
          onClick={mintFreeTokens}
          className="bg-gray-900 text-white hover:bg-gray-800 rounded-full px-12 py-2 sm:w-auto"
          disabled={isMintLoading}
        >
          Mint Tokens
        </button>
        {txSuccess && <p>Success</p>}
      </div>

      <div className="flex flex-col mb-4">
        <button
          onClick={buySomeTokens}
          className="bg-gray-900 text-white hover:bg-gray-800 rounded-full px-12 py-2 sm:w-auto"
        >
          Buy Tokens
        </button>
        {/* No success tag */}
      </div>

      <div className="text-center">
        <h3 className="text-lg ">Total minted</h3>

        <h3 className="text-lg">{supplyData}</h3>
      </div>
    </div>
  );
}
So now we have covered the different ways you can Write and Read from your contract and have it interact with your site.
There are a few other things I wanted to cover that will help you bring data and customize your user interaction.
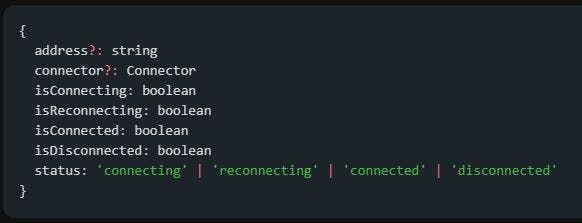
useAccount()
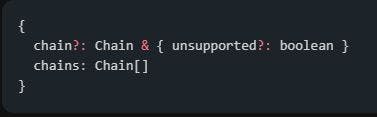
useNetwork()
By now, hopefully return values are starting to make sense and how to access them.
Account Status: Address, connector, statuses
Network: What network chain you are on
I bring it in like this:
const { address } = useAccount();
const { chains } = useNetwork();
I created a useEffect to display the data in the console:
useEffect(() => {
    console.log("address:", address);
    console.log("network", chains);
    console.log("___________");
  }, [address, chains]);
This returns this data:
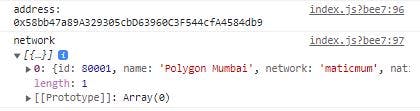
address: 0x58bb47a89A329305cbD63960C3F544cfA4584db9

network
[{…}]
0: {id: 80001, name: 'Polygon Mumbai', network: 'maticmum', nativeCurrency: {…}, rpcUrls: {…}, …}
length: 1
[[Prototype]]: Array(0)
With this information, you can display and address, send to a wallet or make sure things are on the right chain. Wagmi really has many useful tools to keep your code clean and handle many popular functions.
The final "Faucet" function will be a repeat of useContractWrite().
Here is the final code:
Final Code
import { ConnectButton } from "@rainbow-me/rainbowkit";
import {
  useAccount,
  useConnect,
  useContract,
  useContractRead,
  useContractWrite,
  useNetwork,
  useSigner, //<<<<<<<
  useWaitForTransaction,
} from "wagmi";
import { ethers } from "ethers";
import { useState, useEffect } from "react";
import tokenContract from "../contracts/contract.json";

export default function Home() {
  const CONTRACT_ADDRESS = "0xAfCF939f2870fc82920058b147A8ff4db98803a5";
  const [supplyData, setSupplyData] = useState(0);

  const { address } = useAccount();
  const { chains } = useNetwork();
  const { data: signerData } = useSigner();

  /* Not working on this build
  const contractConfig = {
    addressOrName: CONTRACT_ADDRESS,
    contractInterface: tokenContract.abi,
  };
  */

  //Mint Function
  const {
    data: mintData,
    write: mintToken,
    isLoading: isMintLoading,
    isSuccess: isMintStarted,
    error: mintError,
  } = useContractWrite({
    addressOrName: CONTRACT_ADDRESS,
    contractInterface: tokenContract.abi,
    functionName: "mint",
  });

  const mintFreeTokens = async () => {
    await mintToken({
      args: [
        "0x58bb47a89A329305cbD63960C3F544cfA4584db9",
        ethers.utils.parseEther("2"),
      ],
    });
  };

  // Check TX for mint function
  const { isSuccess: txSuccess, error: txError } = useWaitForTransaction({
    confirmations: 1,
    hash: mintData?.hash,
  });

  // Total tokens
  const { data: totalSupplyData } = useContractRead({
    addressOrName: CONTRACT_ADDRESS,
    contractInterface: tokenContract.abi,
    functionName: "totalSupply",
    watch: true,
  });

  //Using useContract only (instead of useContractWrite)
  const buyTokens = useContract({
    addressOrName: CONTRACT_ADDRESS,
    contractInterface: tokenContract.abi,
    signerOrProvider: signerData,
  });

  const buySomeTokens = async () => {
    await buyTokens.buy("1", { value: ethers.utils.parseEther(".01") });
  };

  //Faucet function
  const {
    data: faucetData,
    write: faucetToken,
    isLoading: isFaucetLoading,
    isSuccess: isFaucetStarted,
    error: faucetError,
  } = useContractWrite({
    addressOrName: CONTRACT_ADDRESS,
    contractInterface: tokenContract.abi,
    functionName: "faucet",
  });

  // claim faucet
  const claimFaucet = async () => {
    await faucetToken();
  };


  useEffect(() => {
    if (totalSupplyData) {
      let temp = totalSupplyData / 10 ** 18;
      setSupplyData(temp);
    }
  }, [totalSupplyData]);


  /*
  useEffect(() => {
    console.log("mintData:", mintData);
    console.log("isMintLoading:", isMintLoading);
    console.log("isMintStarted", isMintStarted);
    console.log("mintError:", mintError);
    console.log("___________");
  }, [mintData, isMintLoading, isMintStarted]);
  */

  /*
  useEffect(() => {
    console.log("address:", address);
    console.log("network", chains);
    console.log("___________");
  }, [address, chains]);

  */

  return (
    <div className="container flex flex-col justify-center mx-auto items-center mt-10">
      <div className="flex mb-6">
        <ConnectButton showBalance={false} />
      </div>
      <h3 className="text-5xl font-bold mb-20">{"Billyjitsu's token drop"}</h3>

      <div className="flex flex-col mb-8">
        <button
          onClick={mintFreeTokens}
          className="bg-gray-900 text-white hover:bg-gray-800 rounded-full px-12 py-2 sm:w-auto"
          disabled={isMintLoading}
        >
          Mint Tokens
        </button>
        {txSuccess && <p>Success</p>}
      </div>

      <div className="flex flex-col mb-8">
        <button
          onClick={buySomeTokens}
          className="bg-gray-900 text-white hover:bg-gray-800 rounded-full px-12 py-2 sm:w-auto"
        >
          Buy Tokens
        </button>
        {/* No success tag */}
      </div>

      <div className="flex flex-col mb-4">
        <button
          onClick={claimFaucet}
          className="bg-gray-900 text-white hover:bg-gray-800 rounded-full px-12 py-2 sm:w-auto"
        >
          Claim Faucet
        </button>
        {/* No success tag */}
      </div>

      <div className="text-center">
        <h3 className="text-lg ">Total minted</h3>

        <h3 className="text-lg">{supplyData}</h3>
      </div>
    </div>
  );
}
Hopefully this guide helped you on your coding journey, you can see the web version here: wagmirainbow.vercel.app